Archives 2017

Kamailio Quick Install Guide for v4.4.x – CentOS 7

Are you looking for the CentOS 6 version?  It can be found here

This article will provide step-by-step instructions on how to install Kamailio 4.4.x on CentOS 7 using yum packages.

Setup YUM Repository

  1. Install wget so we can pull down the rpm.
    yum install wget
  2. Let’s download the yum repo file for our CentOS version and update the system so yum is aware of the new repository.
    cd /etc/yum.repos.d/
    wget http://download.opensuse.org/repositories/home:/kamailio:/v4.4.x-rpms/CentOS_7/home:kamailio:v4.4.x-rpms.repo
    
  3. Update system so yum is aware of the new repository.
    yum update
    
  4. You can look at the kamailio packages in the YUM repository by typing:
    yum search kam
    

Install Kamailio and Required Database Modules

  1. Install the following packages from the new repo.
    yum install -y kamailio kamailio-mysql kamailio-debuginfo kamailio-unixodbc kamailio-utils gdb
    
  2. Set kamailio to start at boot.
    chkconfig kamailio on
    
  3. The Kamailio configuration files will be owned by the root user, rather than the kamailio user created by the Kamailio package. We will need to change the ownership of these files.
    chown -R kamailio:kamailio /var/run/kamailio
    chown kamailio:kamailio /etc/default/kamailio
    chown -R kamailio:kamailio /etc/kamailio/
    echo "d /run/kamailio 0750 kamailio kamailio" > /etc/tmpfiles.d/kamailio.conf 

Install MySQL

  1. Since we plan on using MySQL, we will need to install the MySQL server as well as the client.
    yum install -y mariadb-server mariadb
    
  2. Next we need to start up MySQL:
    systemctl start mariadb 
    
  3. And enable mysqld at boot.
    systemctl enable mariadb
  4. Now we can set a root password for mysql:

You can hit yes to all the options. There is no root password as of yet, so the first question will be blank. Be sure to use a secure unique password for your root user.

[root@localhost yum.repos.d]# /usr/bin/mysql_secure_installation

NOTE: RUNNING ALL PARTS OF THIS SCRIPT IS RECOMMENDED FOR ALL MySQL
      SERVERS IN PRODUCTION USE!  PLEASE READ EACH STEP CAREFULLY!

In order to log into MySQL to secure it, we'll need the current
password for the root user.  If you've just installed MySQL, and
you haven't set the root password yet, the password will be blank,
so you should just press enter here.

Enter current password for root (enter for none):
OK, successfully used password, moving on...

Setting the root password ensures that nobody can log into the MySQL
root user without the proper authorisation.

Set root password? [Y/n] Y
New password: (enter password)
Re-enter new password: (enter password)
Password updated successfully!
Reloading privilege tables..
 ... Success!


By default, a MySQL installation has an anonymous user, allowing anyone
to log into MySQL without having to have a user account created for
them.  This is intended only for testing, and to make the installation
go a bit smoother.  You should remove them before moving into a
production environment.

Remove anonymous users? [Y/n] Y
 ... Success!

Normally, root should only be allowed to connect from 'localhost'.  This
ensures that someone cannot guess at the root password from the network.

Disallow root login remotely? [Y/n] Y
 ... Success!

By default, MySQL comes with a database named 'test' that anyone can
access.  This is also intended only for testing, and should be removed
before moving into a production environment.

Remove test database and access to it? [Y/n] Y
 - Dropping test database...
 ... Success!
 - Removing privileges on test database...
 ... Success!

Reloading the privilege tables will ensure that all changes made so far
will take effect immediately.

Reload privilege tables now? [Y/n] Y
 ... Success!

Cleaning up...

All done!  If you've completed all of the above steps, your MySQL
installation should now be secure.

Thanks for using MySQL!

Configure Kamailio to use MySQL

  • By default, Kamailio does not use MySQL. To change this we need to edit one of Kamailio’s configuration files.
vi /etc/kamailio/kamctlrc
  1. Uncomment the DBENGINE parameter by removing the pound symbol and make sure the value equals MYSQL. The parameter should look like this afterwards:
    DBENGINE=MYSQL
    
  2. To have the kamdbctl command create the mysql database with the correct permissions, we will want to set the databaseusers and passwords in kamctlrc
    ## database read/write user
    DBRWUSER="kamailio"
    
    ## password for database read/write user
    DBRWPW="kamailiorw"
    
    ## database read only user
    DBROUSER="kamailioro"
    
    ## password for database read only user
    DBROPW="kamailioro"
    

Create the Kamailio Database Schema

  • The Command will create all the users and tables needed by Kamailio. You will be prompted to put in the MySQL root password that you created in the Install MySQL section of this document. You will be asked if you want to install different tables – just say “yes” to all the questions.
    /usr/sbin/kamdbctl create
    
  • Below are all the prompts you will be presented:
    MySQL password for root: ''
    Install presence related tables? (y/n): y
    Install tables for imc cpl siptrace domainpolicy carrierroute userblacklist htable purple uac pipelimit mtree sca mohqueue rtpproxy?
    (y/n): y
    Install tables for uid_auth_db uid_avp_db uid_domain uid_gflags uid_uri_db? (y/n): y
    
  • The following MySQL users and passwords are created (please change these in a production environment).
  • kamailio – (With default password ‘kamailiorw’) – user which has full access rights to ‘kamailio’ database.
  • kamailioro – (with default password ‘kamailioro’) – user which has read-only access rights to ‘kamailio’ database.

Enable the mysql and auth modules.

Add the following to the beginning of the /etc/kamailio/kamailio.cfg after

#!KAMAILIO#!define WITH_MYSQL
#!define WITH_AUTH

Update the DBURL line to match the username and password you set in kamctlrc before running kamdbctl.

The line looks like this by default:

#!define DBURL "mysql://kamailio:kamailioro@localhost/kamailio"

If you changed the username and password then the new user name and password would look like this

#!define DBURL "mysql://new_username:new_password@localhost/kamailio"

The new_username and new_password fields would be replaced with the values you entered in the /etc/kamailio/kamctlrcfile.

Start the Kamailio Server

service start kamailio

Note, the startup options for Kamailio is located at /etc/default/kamailio

Test Kamailio

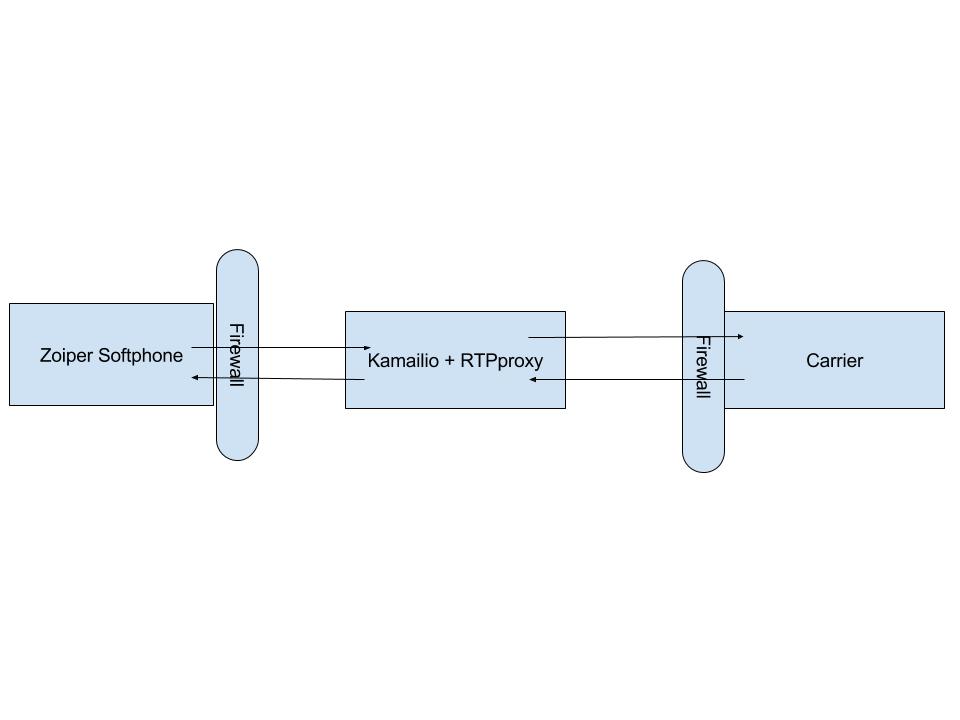
  • In order to test that Kamailio is working correctly, I’m going to create a SIP user account and register that account using a softphone such as X-Lite, Linphone, or Zoiper.

Create SIP User Accounts

  • The following command will create a new SIP User. Note, that the domain portion has to be specified unless you export the SIP_DOMAIN environment variable.
    kamctl add <extension@domain> <extension password>
    
  • Here is what I created
    kamctl add 1001@dopensource.com opensourceisneat
    

Registering a SIP Softphone

  • configure whichever softphone you choose with the following options:
    User ID: 1001
    Domain:
    Password: opensourceisneat
    
  • Once you are registered, you can view all the registered extensions in kamailio with the following command:
    kamctl ul show
    
    You will get something like this: Domain:: location table=1024 records=1 max_slot=1 AOR:: 1001 Contact:: sip:1001@192.168.1.140:40587;rinstance=636c6f6dedce9a2b;transport=UDP Q= Expires:: 3559 Callid:: OWNlYzg2YThmMmI1MGM1YjMyZTk3NjU2ZTdhMWFlN2E. Cseq:: 2 User-agent:: Z 3.3.21937 r21903 State:: CS_NEW Flags:: 0 Cflag:: 0 Socket:: udp:104.131.171.248:5060 Methods:: 5087 Ruid:: uloc-5a2f0176-36a3-1 Reg-Id:: 0 Last-Keepalive:: 1513030025 Last-Modified:: 1513030025

Make a Test Call

  • You can call yourself by entering 1001 into your softphone. If it rings then you have a basic Kamailio server installed and ready to be configured to provide load balancing, failover, accounting, etc. As an exercise, you should create another SIP user account and register that user using another softphone and try calling between the two SIP users.

References

  • Install And Maintain Kamailio v4.1.x From GIT – http://www.kamailio.org/wiki/install/4.4.x/git

Configuring Panasonic KX-TGP600

The purpose of this tutorial is to explain how to configure a Panasonic KX-TGP600 phone with FreePBX or Asterisk.  We will assume that you have the extension already configured in FreePBX or Asterisk.  Therefore, we will focus on the steps needed to configure the phone.

The high-level steps needed to complete this are listed below.  We will go into detail for each section.

  • Enable Web Management GUI
  • Accessing the Web Management GUI
  • Configure the phone settings via the Web Management GUI

Enable Web Management GUI

The first step is to enable the embedded web function on the phone. This is done by using the cordless phone’s handset and following the steps listed below:

  • Turn on the phone and select the Menu function
  • Select the Setting Handset option
  • Select the Other option
  • Select the Embedded Web option
  • Select the On option

Important Note: The Embedded command that you select on the phone, will only last less than 5 minutes before it switches back off. If, at some point, you are unable to log into the Web Management GUI or you find that the Management GUI loses connection, then repeat the instructions for Enabling the Web GUI listed above to turn the Embedded Web feature back on. Refresh the web page or log back in.

Once these steps are completed, you are now ready for the next step which is Accessing the Web Management GUI in order to program your phone.


Accessing the Web Management GUI

Before you are able to access the Web Management GUI, you must first know the cordless phone’s IP address. An easy way to get this, is using the phone’s handset again and following the steps listed below:

  1. Turn on the handset and select the Menu option
  2. Select the System Settings icon
  3. Select the Status option
  4. Select the IPv4 Settings option
  5. Select the IP Address option

You now have access to the IP address for your Panasonic phone.

Configure the phone settings via the Web Management GUI

The IP address listed on the handset’s display, is what you will type into your web browser in order to access the Web Management GUI.

After entering in the phone’s IP address, a window will popup asking for the phone’s User Name and Password.

The default login for the Panasonic KX-TGP600 phone is:

User Name: admin

Password: adminpass

  1. Once you are logged in, select the VoIP tab
  2. Under the SIP Settings listed on the left side under VoIP, click on the Line 1 option. The screen should now be titled SIP Settings [Line 1]
  3. Enter the extension number in the fields labeled Phone Number and Authentication ID
  4. Enter the SIP address in the fields labeled Registrar Server Address, Proxy Server Address and Outbound Proxy Server address
  5. Enter the Server Port in the fields labeled Registrar Server Port, Proxy Server Port, Presence Server Port and the Outbound Proxy Server Port
  6. Enter the extension’s secret (the password for the phone) into the field labeled Authentication password.
  7. Click on the button labeled Save at the bottom of the page.
  8. Restart the phone. Wait for it to finish loading back up. You will hear a dial-tone when it is finished and ready for use.

Congrats, your phone is now configured and is ready to move on the next section, Testing the Phone.


Here is an example of a completed Web Management GUI screen:


Testing the phones

Once you have entered all of the information above,  clicked on the Web Management GUI’s save button, you are now free to test the phone by making incoming and outgoing phone calls.

Quick Guide To Installing and Configuring RTPProxy: CentOS 7.3

Configuring an RTP Proxy is one of the most confusing topic’s around setting up Kamailio. The goal of this article is to help you select the correct RTP Proxy implementation to install, discuss one common use case/pattern that RTP Proxy is used for and then setup up a RTP Proxy implementation to work with Kamailio.

Note: We offer paid support for designing, configuring and supporting VoIP infrastructures that contain Kamailio.   
You can purchase support from Here

The Scenario

There are multiple use cases for using a RTP Proxy. However, in efforts to demonstrate how to use a RTP Proxy we are going to look at a simple use case where Kamailio is handling user registration and then passing the call directly to a carrier for making the outbound call, which is depicted below:

rtpproxy diagram

In this scenario, the User Agent is passing the SIP INVITE thru Kamailio. However, the SDP contains the local ip address of the User Agent because Kamailio is simply doing its job and passing the traffic thru without touching the requests. This means that the carrier can’t send the RTP traffic back to the User Agent because it’s sitting behind a firewall and the internal ip address is being sent in the SDP. Therefore, we need to install and configure a RTP Proxy. In the next section we will select the a RTP Proxy implementation to implement.

Select a RTP Proxy Implementation

There are 2 main versions of RTPProxy and it’s very confusing for a newbie to figure out which version you should implement.

Name Pro’s Con’s REPO
RTPProxy not sure Doesn’t seem to be well documented download
RTPEngine (formedly mediaproxy-ng) Works with WebRTC clients Not well documented download

Since we are not going to implement WebRTC we can use RTPProxy.

Installing RTPProxy

Install pre-req’s and rtpproxy repo using yum package manager:

yum -y update
yum -y install gcc gcc-c++ bison openssl-devel libtermcap-devel ncurses-devel doxygen      \
            curl-devel newt-devel mlocate lynx tar wget nmap bzip2 unixODBC unixODBC-devel      \
            libtool-ltdl libtool-ltdl-devel mysql-connector-odbc mysql mysql-devel mysql-server \
            flex libxml2 libxml2-devel pcre pcre-devel git

From here you can either install using yum or from source.
We recommend installing from src as there are needed patches in new releases.

Installing RTPProxy from Source

Clone and compile the latest from github

cd /usr/src/
git clone --recursive https://github.com/sippy/rtpproxy.git
cd rtpproxy
./configure
make
make install

Copy the init script to init.d/ directory

/bin/cp -f rpm/rtpproxy.init /etc/rc.d/init.d/rtpproxy &&
chmod +x /etc/rc.d/init.d/rtpproxy

Create the rtpproxy user and group

mkdir -p /var/run/rtpproxy
groupadd rtpproxy
useradd -d /var/run/rtpproxy -M -s /bin/false rtpproxy
chown rtpproxy:rtpproxy -R /var/run/rtpproxy

Change the config file to use the rtpproxy binary.
You may need to replace if you installed in custom location.

sed -i 's:rtpproxy=/usr/bin/:rtpproxy=/usr/local/bin/:' /etc/rc.d/init.d/rtpproxy

I had to manually add the path of the program, as follows:

cat << 'EOF' > /etc/profile.d/rtpproxy.sh
#!/bin/sh
#
# Set an alias for compiled version of rtpproxy

# Change if installed in custom location
rtpproxy_prog="/usr/local/bin/rtpproxy"

if [ -f "$rtpproxy_prog" ] && [ -x "$rtpproxy_prog" ]; then
    export PATH=$PATH:$rtpproxy_prog
fi
EOF

Source your global shell environment configs;

source /etc/profile & source ~/.bashrc

Make rtpproxy start on boot:

chkconfig rtpproxy on

Replace startup options with whatever you want rtpproxy to start with:

local_ip=your.local.i.p
external_ip=your.external.i.p
echo 'OPTIONS="-F -s udp:127.0.0.1:7722 -l $local_ip -A $external_ip -m 10000 -M 20000 -d DBUG:LOG_LOCAL0"' > /etc/sysconfig/rtpproxy

Enabling NAT within Kamailio Configuration File

We used Flowroute for our carrier here. other carriers would be similar. If using Flowroute, you will need to login to your Flowroute account and obtain your techprefix.

We will assume that you are using the default kamailio.cfg file that ships with Kamailio.

  1. vi /etc/kamailio/kamailio.cfg
  2. add the following to the top of your config, beneath #!KAMAILIO
#!define WITH_MYSQL
#!define WITH_AUTH
#!define WITH_NAT
#!define WITH_USRLOCDB
#!define WITH_FLOWROUTE
  1. save the configuration

Update the port kamailio listens on:

  1. vi /etc/kamailio/kamailio.cfg
  2. find the line that starts with: #listen=udp:10.0.0.10:5060
  3. after that line add: listen=udp:yourlocalip:5060 advertise yourpublicip:5060
  4. save the file

Add the carrier routing logic:

  1. vi /etc/kamailio/kamailio.cfg
  2. in the routing logic section find “route[PSTN] {“
  3. add the following inside that function, replace with your own values:
#!ifdef WITH_FLOWROUTE
        $var(sip_prefix) = "<Flowroute carrier prefix>";  #Leave empty if your carrier doesn't require it
        $var(carrier_ip) = "216.115.69.144"; #Signaling IP for Flowroute. Replace with your carrier info

        # add prefix to rU
        $rU = $var(sip_prefix) + $rU;

        # forward to flowroute
        forward($var(carrier_ip), 5060);
        exit;
#!endif

Startup

Start rtpproxy:

service rtpproxy start

Restart kamailio:

You need to restart Kamailio if you make changes to rtpproxy configuration. In our case, we just installed it. So, you need to restart Kamailio in order for it to connect to the RTPProxy.

kamctl restart

Testing RTPProxy and Kamailio

First off make sure both Kamailio and Rtpproxy are running:

ps -ef | grep rtpproxy
ps -ef | grep kamailio

If either service fails to start check your logs while starting the service.
Open another terminal and run the following:

# terminal 2
tail -f /var/log/messages

Then in your original terminal start the services one by one.
You will see errors labeled. One of those will lead to your problem.

Add a test extension to Kamailio

If you already have a test extension in Kamailio you can skip this section.
“test” is our pw for extension “1001”:

kamctl add 1001@your.domain.com test

Now try to register a softphone with the extension you added.

Once registered run the following cmd and you should see your extension:

kamctl ul show

Try to make calls using that extension and capture the traffic. We will assume that you have either sngrep or ngrep installed already.

Your INVITE and 200 OK messages should be rewritten correctly.

Sources:

RTPProxy Revisted
RTPProxy Control Protocol

Installing OpenLDAP 2.4 and Configuring Apache DS – Part 3

This web series is brought to you by: dOpenSource and Flyball Labs

This post is PART 3 of a series that details how to install Apache Directory Studio and OpenLDAP server and connect the two seamlessly. In the last post we went adding users, groups and organizations to your OpenLDAP server. We also went over modifying existing users and groups in your LDAP tree as well and how to query your LDAP database.

We have been using “.ldif” files and a terminal to manage our OpenLDAP tree thus far, but this method (although necessary to start) doesn’t provide a very nice “User Experience” or UX as we call it on the dev side of the house. So lets change that and put a nice Graphical User Interface (GUI) on top of our OpenLDAP system to manage our LDAP tree entries.

A quick note: there is a ton of information on querying your OpenLDAP tree structure that we have not yet touched on. Learning these methods will be vital to managing your users quickly and efficiently. Just to give you a glimpse forward, there are many advanced methods for searching and filtering LDAP queries such as: specifying search base, binding to a DN, specifying scope or search, advanced regular expression matching and filter output fileds, to name a few. We will go over ways to effectively get your data from your OpenLDAP server in a later post.

If you haven’t read PART 1 you can find it here: Installing OpenLDAP

If you haven’t read PART 2 you can find it here: Configuring OpenLDAP

We will now walthrough the installation of Apache Direcotry Studio and how to connect it to your existing OpenLDAP server. The examples below assume that the domain is dopensource.com but, you MUST REPLACE this with your own domain. Lets get started!

Requirements

This guide assumes you have either a Debian-based or cent-os / red-hat based linux distro.
This guide also assumes that you have root access on the server to install the software.
This guide assumes you have followed the steps in PART 1 and PART 2 of the series and have an OpenLDAP server configured with some test users and groups added to your tree.

Installing Apache Directory Studio


Switch to root user and enter your root users pw

Either using sudo:

sudo -i

Or if you prefer using su:

su

Install Oracle Java

Prior to installing Apache Directory Studio (Apache DS) we need to install Oracle Java version 8 or higher. The easiest way to do this is through a well a maintained repository / ppa.

Unistall all old versions of openjdk and oracle jdk:

On a debian based system the cmd would be:

apt-get -y remove --purge $(apt list | grep -ioP '.*open(jre|jdk).*' 'oracle-java.*' '^java([0-9]{1}|-{1}).*' '^ibm-java.*')

On a centos based system the cmd would be:

yum -y erase $(yum list | grep -ioP '(.*open(jre|jdk).*|oracle-java.*|^java([0-9]{1}|-{1}).*|^ibm-java.*)'
Remove old Java environment variables

We also need to cleanup any old java environment variables that may cause issues when we install the new version.

Check your environment for any java variables using this cmd:

env | grep "java"

If there are no matches then you can move on to the next section. Otherwise you need to manually remove those variables from your environment.

Check each one of the following files to see if there are any vars we need to remove. If you get a match remove the line that contains that variable entry (most likely an export statement):

cat /etc/environment 2> /dev/null | grep "java"
cat /etc/profile 2> /dev/null | grep "java"
cat ~/.bash_profile 2> /dev/null | grep "java"
cat ~/.bash_login 2> /dev/null | grep "java"
cat ~/.profile 2> /dev/null | grep "java"
cat ~/.bashrc 2> /dev/null | grep "java"

To remove the line just use your favorite text editor and source that file. For example if .bashrc what the culprit:

vim ~/.bashrc
... remove stuff ...
source ~/.bashrc

Now you are ready to install a recent release of Oracle Java.

Download and install Oracle JDK

For debian based systems there is a group of developers that package the latest versions of Oracle Java and provide it as a ppa repository. This is very convenient for updating Java versions. For centos based systems you will have to download the tar file of the latest release from Oracle’s website and install it manually.

For debian based systems we will add the ppa, update our packages and install the latest release of Oracle JDK.

cat << EOF > /etc/apt/sources.list.d/oracle-java.list
deb http://ppa.launchpad.net/webupd8team/java/ubuntu trusty main
deb-src http://ppa.launchpad.net/webupd8team/java/ubuntu trusty main
EOF

apt-key adv --keyserver hkp://keyserver.ubuntu.com:80 --recv-keys EEA14886
apt-get -y update && apt-get -y install oracle-java8-installer
apt-get install oracle-java8-set-default

For centos based systems go to Oracle’s website here click on accept license agreement and copy the link of the linux .rpm file corresponding to your OS architecture. If you don’t know what architecture your machine is run the following command to find out:

uname -m

Now dowload and install the rpm using the following cmds:

JAVA_URL='the link that you copied'
JAVA_RPM=${JAVA_URL##*/}

cd /usr/local/
wget -c --no-cookies --no-check-certificate \
--header "Cookie: gpw_e24=http%3A%2F%2Fwww.oracle.com%2F; oraclelicense=accept-securebackup-cookie" \
"$JAVA_URL"

rpm -ivh "$JAVA_RPM"
rm -f "$JAVA_RPM"

unset JAVA_URL && 
unset JAVA_RPM

At this point you should have Oracle Java JDK installed on your machine. Verify with the following cmds:

java -version
javac -version

You should see output similar to the following:

[root@box ~]# java -version
java version "1.8.0_131"
Java(TM) SE Runtime Environment (build 1.8.0_131-b11)
Java HotSpot(TM) 64-Bit Server VM (build 25.131-b11, mixed mode)

[root@box ~]# javac -version
javac 1.8.0_131

If you get an error here you may need to uninstall any dependencies on your system that are linked to the old java version and redo the process. One example may be libreoffice (often installed by default and depends on default java installation) which we could remove with following:

Debian based systems:

apt-get -y remove --purge '.*libreoffice.*'

Centos based systems:

yum -y remove '.*libreoffice.*'

For those with errors; after removing any packages that depended on the old versions of java, go back through the installation steps outlines above and you should be able to print out your java version.

Set Java environment vars for new version

First we will set our environment variables using a script we will make here: /etc/profile.d/jdk.sh

cat << 'EOF' > /etc/profile.d/jdk.sh
#!/bin/sh
#
# Dynamic loading of java environment variables
# We also set class path to include the following:
# if already set the current path is included,
# the current directory, the jdk and jre lib dirs,
# and the shared java library dir.
#

export JAVA_HOME=$(readlink -f /usr/bin/javac 2> /dev/null | sed 's:/bin/javac::' 2> /dev/null)
export JRE_HOME=$(readlink -f /usr/bin/java 2> /dev/null | sed 's:/bin/java::' 2> /dev/null)
export J2SDKDIR=J2REDIR=$JAVA_HOME
export DERBY_HOME=$JAVA_HOME/db

export PATH=$PATH:$JAVA_HOME/bin:$JRE_HOME/bin:$DERBY_HOME/bin
export CLASSPATH=$CLASSPATH:.:$JAVA_HOME/lib:$JRE_HOME/lib:/usr/share/java
EOF

After our script is created make it executable, and then source the main profile.

chmod +x /etc/profile.d/jdk.sh
source /etc/profile

You should now see the environment variables we added above when running this cmd:

env | grep -oP '.*(JAVA_HOME|JRE_HOME|J2SDKDIR|J2REDIR|DERBY_HOME|CLASSPATH).*'

Lastly we are going to enable the Java client for our web browsers:

Close all instances of firefox and chrome:

kill all firefox
kill all chrome

Grab the plugin from your Oracle Java install and link it:

JAVA_PLUGIN=$(find ${JRE_HOME}/ -name 'libnpjp2.so')

mkdir -p /usr/lib/firefox-addons/plugins && cd /usr/lib/firefox-addons/plugins
ln -s ${JAVA_PLUGIN}

mkdir -p /opt/google/chrome/plugins && cd /opt/google/chrome/plugins
ln -s ${JAVA_PLUGIN}

unset JAVA_PLUGIN
cd ~

Install the Apache Directory Studio suite

Download either the 32bit or 64bit (depending on you OS) version of Apache DS with the following:

APACHE_DSx64_URL="http://www-eu.apache.org/dist/directory/studio/2.0.0.v20161101-M12/ApacheDirectoryStudio-2.0.0.v20161101-M12-linux.gtk.x86_64.tar.gz"

APACHE_DSx32_URL="http://www-eu.apache.org/dist/directory/studio/2.0.0.v20161101-M12/ApacheDirectoryStudio-2.0.0.v20161101-M12-linux.gtk.x86.tar.gz"

APACHE_DS_URL="the url for your os architecture"
APACHE_DS_TAR=${APACHE_DS_URL##*/}

cd /usr/local/
wget --no-cookies --no-check-certificate "$APACHE_DS_URL"
tar -xzf "$APACHE_DS_TAR" && rm -f "$APACHE_DS_TAR" && cd ApacheDirectoryStudio

Now you can start the gui with the following cmd:

./ApacheDirectoryStudio

If you are configuring this on a remote server (like I was) you will need to set the ssh configs properly to forward X-applications (GUI / display) over to your local machine. If you are configuring the server locally and have a display you can skip this step.

Enable X11 forwarding over ssh on the remote server:

sed -ie '0,/.*X11Forwarding.*/{s/.*X11Forwarding.*/X11Forwarding yes/}; 0,/.*X11UseLocalhost.*/{s/.*X11UseLocalhost.*/X11UseLocalhost yes/}' /etc/ssh/sshd_config

Now disconnect and allow your local machine’s ssh client to receive the forwarded display:

sed -ie '0,/.*ForwardX11.*/{s/.*ForwardX11.*/ForwardX11 yes/}; 0,/.*ForwardX11Trusted.*/{s/.*ForwardX11Trusted.*/ForwardX11Trusted yes/}' /etc/ssh/ssh_config

Then establish a an ssh connection with remote X11 forwarding enabled and run it:

ssh -Y -C -4 -c blowfish-cbc,arcfour 'your remote user@your remote server ip'
cd /usr/local/ApacheDirectoryStudio
./ApacheDirectoryStudio

You should now see the GUI appear. Lets connect to our OpenLDAP server.

Click on the buttons File –> New –> LDAP Browser –> LDAP Connection>

Enter a name for your connection and enter the hostname of the LDAP server (you can find it using the **hostname** cmd)

Make sure to check your connection to the server by pressing the “Check Network Parameter” button before moving on. If you get an error, verify connectivity to the OpenLDAP server and port that your entered and try again.

Enter the LDAP admin’s Bind DN and password. From our example in the first blog post it would look something like this:

Bind DN or user: cn=Manager,dc=dopensource,dc=com

Bind Password: ‘ldap admin password’

Make sure to click the “Check Authentication” button and verifiy your credentials before moving on.

Enter your Base DN, for our example this was: **dc=dopensource,dc=com**

Check the feature box “Fetch Operational attributes while browsing”

You can now click “finish” and your connection to your OpenLDAP server through Apache DS is complete.

To view your DN and to manage the entries we made earlier:

click the LDAP icon on the left and it will bring up the sidbar for LDAP

Alternatively you can navigate to your LDAP tree by clicking window –> show view –> ldap browser

Congratulations you have set up your Apache DS front-end application to access your OpenLDAP server!

For More Information


For more information, or for any questions visit us at:

dOpenSource

Flyball Labs

For Professional services and Ldap configurations see:

dOpenSource OpenLDAP

dOpenSource OpenLDAP Services

If you have any suggestions for topics you would like us to cover in our next blog post please leave them in the comments 🙂

Written By:

DevOpSec
Software Engineer
Flyball Labs

— Keep Calm and Code On —

Installing OpenLDAP-2.4 and Configuring Apache DS – Part 2

This web series is brought to you by: dOpenSource and Flyball Labs

This post is PART 2 of a series that details how to install Apache Directory Studio and OpenLDAP server and connect the two seamlessly. In the last post we went over installing OpenLDAP server and you should now have an operating OpenLDAP server on either a Debian based or Cent-OS based machine.

If you haven’t read PART 1 you can find it here: Installing OpenLDAP

We will now go over adding users, groups and organizations to your nice and shiny OpenLDAP server. These are all LDAP entries that will go in your OpenLDAP tree. The examples below assume that the domain is dopensource.com but, you MUST REPLACE this with your own domain. Lets get started!

Requirements

This guide assumes you have either a Debian-based or cent-os / red-hat based linux distro.
This guide also assumes that you have root access on the server to install the software.
This guide assumes you have followed the steps in PART 1 of the series and have an OpenLDAP server configured and running already.

Adding LDAP entries to your OpenLDAP tree


Switch to root user and enter your root users pw

Either using sudo:

sudo -i

Or if you prefer using su:

su

Adding an Organization Unit (OU)

Lets add an OU to our tree called ‘users’ that will hold all of our companies users.

We will modify our tree the same we did before, using tmp .ldif files and loading into ldap.

cat << EOF > /tmp/users.ldif
dn: ou=Users,dc=dopensource,dc=com
objectClass: organizationalUnit
ou: Users
EOF

Then add it to the tree using the following cmd:

ldapadd -f /tmp/users.ldif -D cn=Manager,dc=dopensource,dc=com -w < ldap admin pw >

And of course we clean up after ourselves:

rm -f /tmp/users.ldif

Lets check out our new and shiny organization in ldap:

ldapsearch -x -L -b dc=dopensource,dc=com

Adding Users to the OU

Next lets add some of our employess to the users OU:

cat << EOF > /tmp/fred.ldif
dn: cn=Fred Flintstone,ou=Users,dc=dopensource,dc=com
cn: Fred Flintstone
sn: Flintstone
objectClass: inetOrgPerson
userPassword: < user password >
uid: fflintstone
EOF

cat << EOF > /tmp/wilma.ldif
dn: cn=Wilma Flintstone,ou=Users,dc=dopensource,dc=com
cn: Wilma Flintstone
sn: Flintstone
objectClass: inetOrgPerson
userPassword: < user password >
uid: wflintstone
EOF

Like before we need to add the entry to our tree:

ldapadd -f fred.ldif -D cn=Manager,dc=dopensource,dc=com -w < ldap admin pw >
ldapadd -f wilma.ldif -D cn=Manager,dc=dopensource,dc=com -w < ldap admin pw >

And then cleanup for a nice and clean system:

rm -f /tmp/fred.ldif
rm -f /tmp/wilma.ldif

Lets make sure we didn’t miss any employees in our long list of users:

ldapsearch -x -L -b ou=Users,dc=dopensource,dc=com

Adding a Group to the OU

We have to seperate our employees because the Engineers don’t play nice with the Salesperson’s:

cat << EOF > /tmp/engineering.ldif
dn: cn=Engineering,ou=Users,dc=dopensource,dc=com
cn: Engineering
objectClass: groupOfNames
member: cn=Fred Flintstone,ou=Users,dc=dopensource,dc=com
EOF

cat << EOF > /tmp/sales.ldif
dn: cn=Sales,ou=Users,dc=dopensource,dc=com
cn: Sales
objectClass: groupOfNames
member: cn=Wilma Flintstone,ou=Users,dc=dopensource,dc=com
EOF

Lets add it to the good ‘ol christmass tree of ldap:

ldapadd -f /tmp/engineering.ldif -D cn=Manager,dc=dopensource,dc=com -w < ldap admin pw >
ldapadd -f /tmp/sales.ldif -D cn=Manager,dc=dopensource,dc=com -w < ldap admin pw >

And we have to cleanup after the holiday party:

rm -f /tmp/engineering.ldif
rm -f /tmp/sales.ldif

Lets check our groups and make sure they mingle well together:

ldapsearch -x -L -b ou=Users,dc=dopensource,dc=com cn=Engineering
ldapsearch -x -L -b ou=Users,dc=dopensource,dc=com cn=Sales

We can narrow it down even further, if we only want to see what groups exist:

ldapsearch -x -LLL -b "ou=Users,dc=dopensource,dc=com" "(&(objectclass=groupOfNames))" *

Adding an Existing User to an Existing Group

So Fred is sick and tired of R&D and wants to sell stuff, lets transfer him over to sales:

cat << EOF > /tmp/addtogroup.ldif
dn: cn=Sales,ou=Users,dc=dopensource,dc=com
changetype: modify
add: member
member: cn=Fred Flintstone,ou=Users,dc=dopensource,dc=com
EOF

Get him on the sales floor by adding into Sales group:

ldapadd -f /tmp/addtogroup.ldif -D cn=Manager,dc=dopensource,dc=com -w < ldap admin pw >

Gotta cleanup his desk before we go visit:

rm -f /tmp/addtogroup.ldif

Lets check out Fred’s new office:

ldapsearch -x -LLL -b "ou=Users,dc=dopensource,dc=com" "(&(cn=Engineering))" member

Looks like he’s right next to Wilma, hopefully they work well together 🙂

For More Information


For more information, the next post in the series or for any questions visit us at:

dOpenSource
Flyball Labs

For Professional services and Ldap configurations see:

dOpenSource OepnLDAP
dOpenSource OpenLDAP Services

Written By:

DevOpSec
Software Engineer
Flyball Labs

Installing OpenLDAP 2.4 and Configuring Apache DS – Part 1

This web series is brought to you by: dOpenSource and Flyball Labs

This post is PART 1 of a series that details how to install Apache Directory Studio and OpenLDAP server and connect the two seamlessly. OpenLDAP is what’s referred to as an “Lightweight Directory Access Protocol” or LDAP for short, and is based on X.500 standards.

OpenLDAP can be used to manage user and groups in an organization and authenticate them on your systems, through certificate validation. APache DS is the front-end GUI we will be using to interface with our OpenLDAP server to manage our users and groups.

A quick note before we begin; in this post we use angle brackets to denote that you either need to input information there, or that there will be information output there. Great, lets get started!

Requirements

This guide assumes you have either a Debian-based or cent-os / red-hat based linux distro.
This guide also assumes that you have root access on the server to install the software.

Installing OpenLDAP Server


Switch to root user and enter your root users pw

Either using sudo:

sudo -i

Or if you prefer using su:

su

Install OpenLDAP dependencies using you package manager

On Debian based systems would be:

apt-get update -q -y
apt-get install -q -y dpkg slapd ldap-utils ldapscripts

On cent-os / rhel systems:

yum -y -q update
yum -y -q install openldap compat-openldap openldap-clients \
        openldap-servers openldap-servers-sql openldap-devel

The debian package may ask you for the admin ldap password now, no worries. We are going to write over this in the next step so put the same password that you will use throughout the tutorial.

Create a password for the admin ldap user

slappasswd
<enter secret pw here>
<re-enter secret pw here>
<you will see hash of pw here>

Copy the hash that is output from this cmd to your clipboard.

Update the ldap conf file with the new password

We are going to move to the dir where our ldap configs are:

For centos / rhel that is here: /etc/openldap/slapd.d/cn\=config
For debian / ubuntu that is here: /etc/ldap/slapd.d/cn\=config

Then we need to add the root pw hash we copied from last step.

cd /etc/*ldap/slapd.d/cn\=config
echo "olcRootPW: {SSHA}<pw hash goes here>" >> olcDatabase\=\{2\}bdb.ldif

Modify the distinguished name or (DN) for short; of the olcSuffix. This can be done using sed:

You should set the suffix to your DNS domain name. This will be appended to the DN in your tree.
For example, for dopensource.com would be:

sed -i "s/olcSuffix:.*/olcSuffix: dc=dopensource,dc=com/" olcDatabase\=\{2\}bdb.ldif
sed -i "s/olcRootDN:.*/olcRootDN: cn=Manager,dc=dopensource,dc=com/" olcDatabase\=\{2\}bdb.ldif

You would replace dopensource && com with your own domain.

Now change the monitor.ldif file to match tholcRootDN we changed earlier in bdb/ldif:

sed -i 's/olcAccess:.*/olcAccess: {0}to *  by dn.base="gidNumber=0+uidNumber=0,cn=peercred,cn=external,cn=auth" read  by dn.base="cn=Manager,dc=dopensource,dc=com" read  by * none/' olcDatabase={1}monitor.ldif
sed -ie '7d;' olcDatabase={1}monitor.ldif

Restrict users from viewing other users’ password hashes:

echo 'olcAccess: {0}to attrs=userPassword by self write by dn.base="cn=Manager,dc=dopensource,dc=com" write by anonymous auth by * none' >> olcDatabase\=\{2\}bdb.ldif
echo 'olcAccess: {1}to * by dn.base="cn=Manager,dc=dopensource,dc=com" write by self write by * read' >> olcDatabase\=\{2\}bdb.ldif

Set OpenLDAP service to start on boot

chkconfig slapd on
service slapd start

If you get any echecksum errors, such as:

5900f369 ldif_read_file: checksum error on "/etc/openldap/slapd.d/cn=config/olcDatabase={0}config.ldif"
5900f369 ldif_read_file: checksum error on "/etc/openldap/slapd.d/cn=config/olcDatabase={1}monitor.ldif"
5900f369 ldif_read_file: checksum error on "/etc/openldap/slapd.d/cn=config/olcDatabase={2}bdb.ldif"

Then you must run the following commands to fix your checksums before adding any entries.

Fixing checksum errors in config files

Copy the file(s) shown to have bad checksums when starting slapd to /tmp

mkdir -p /tmp/fixes &&
/bin/cp -rf /etc/openldap/slapd.d/cn=config/{olcDatabase={0}config.ldif,olcDatabase={1}monitor.ldif,olcDatabase={2}bdb.ldif} /tmp/fixes &&
cd /tmp/fixes

Remove the first 2 lines containing the old checksums:

for file in /tmp/fixes/*; do
    sed -i '1,2d' "${file}"
done

Install the zlib dev package and perl archive utils if not installed

For centos based systems:

yum -y -q install zlib-dev perl-Archive-Zip

For debian based sytems:

apt-get -y -q install zlib1g-dev libarchive-zip-perl

Now we can go ahead and calculate the new checksums:

for file in /tmp/fixes/*; do
CRC=$(crc32 "$file")

read -r -d '' INSERT_LINES << EOF
# AUTO-GENERATED FILE - DO NOT EDIT!! Use ldapmodify.
# CRC32 ${CRC}
EOF

cat << EOF > "${file}"
${INSERT_LINES}
$(cat ${file})
EOF
done

Then copy back the fixed files over the originals & delete tmp folder:

/bin/cp -rf /tmp/fixes/* /etc/openldap/slapd.d/cn=config/
cd /tmp && rm -Rf fixes

Create the root entry in our ldap tree.

The root entry is going to be configured as a special entry called a domain controller. To do this we will add the same domain name we have been using to the domain controller root entry.

Create the root entry in a temp file, should be named after your domain:

cat << EOF > /tmp/dopensource.ldif
dn: dc=dopensource,dc=com
objectClass: dcObject
objectClass: organization
dc: dopensource
o : dopensource
EOF

Add the contents of the file to your tree (pw is the amdmin ldap user):

ldapadd -f /tmp/dopensource.ldif -D cn=Manager,dc=dopensource,dc=com -w <your ldap admin pw>

Verify it was added (you should see the same info you added displayed):

ldapsearch -x -LLL -b dc=dopensource,dc=com

If you got back the same entry you put in, then delete the temp file:

rm -f /tmp/dopensource.ldif

We add in a symlink for better portable here:

ln -s /etc/openldap /etc/ldap

Allow access to the ldap server in your firewall rules:

iptables -A INPUT -p tcp --dport 389 -j ACCEPT
/sbin/service iptables save
iptables -F
service iptables restart

To ensure your iptables rule persisted you can check with:

iptables -L

To verify ldap is up check on port 389:

netstat -antup | grep -i 389 --color=auto
<terminal output here>

You should see LISTEN in your output, something like this:

tcp        0      0 0.0.0.0:389                 0.0.0.0:*                   LISTEN      22905/slapd
tcp        0      0 :::389                      :::*                        LISTEN      22905/slapd

For More Information


For more information, the next post in the series or for any questions visit us at:

dOpenSource
Flyball Labs

For Professional services and Ldap configurations see:

dOpenSource OepnLDAP
dOpenSource OpenLDAP Services

Written By:

DevOpSec
Software Engineer
Flyball Labs

Creating Custom OCF Resource Agents

A Simple Guide for Creating OCF Resource Agents with Pacemaker and Corosync


HA Clustering Explained

For those not familiar with High Availability resources & services or Cluster Computing, in this section we will go over a brief summary and explanation of OCF RA’s before we dive in to creating our own. In cluster networking multiple servers are inter-connected together on a network to provide improved delivery of services such as with HA.

The servers (referred to as nodes) are all managed by a Cluster Resource Manager (CRM), which as you may have guessed, manages cluster resources. High Availability (HA) refers to the ability to provide a resource or service with minimal to zero downtime. In layman’s terms, whatever client wants, client gets, and the store is open 24/7/365. In our case we will be using Pacemaker as our CRM.

Now each node has to have a way to communicate with other nodes in cluster for this to work, when a resource fails, or a node goes down, the CRM needs to be notified to make other resources available. This is where Corosync steps in. Corosync the communication layer that provides Pacemaker with the status of resources and nodes on the cluster. The information that Pacemaker receives can communicate many complex situations and scenarios that Pacemaker can deal with in a variety of ways.

OCF Resource Agents

Where do the Resource Agents fit into this picture you say? Glad you asked, the RA’s are deployed by pacemaker to interface with each resource that needs managed, using Corosync’s communication layer. The protocol used by the RA’s is known as the Open Cluster Framework (OCF) and defines how RA’s should be implemented and requirements to create one. Most of the time they are implemented in a shell script, but they can be written in any programming language needed. More info on HA cluster computing and OCF protocol implementation can be found at Cluster Labs and if you have any further questions feel free to email us at Flyball Labs That is it for the lecture today, on with the chlorophyll!


How to Create Your Own OCF RA


Prerequisites

This guide assumes that you have Corosync and Pacemaker setup on muli-node cluster (atleast 2).

You must also have access to the remote nodes via ssh / scp to transfer the completed files. Note that every node will need a copy of the RA script.

Design

We will be creating a simple Resource Agent that runs a supplied script to perform a health check. Our health check will simply check if the node has any hard drives that are 95% used or more. If the health check does not pass, then we must shut the node down and perform a failover to another node (including our RA).

Instructions

  1. First we are going to grab a template OCF script. You will need to install git cmd line package if you haven’t installed already. Change dir into that directory.
    
        git clone https://github.com/russki/cluster-agents.git &&
        cd cluster-agents
    
  2. Make a copy and rename the RA something pertinent like “HealthAgent”.
        cp generic-script health-agent
    
  3. Make sure to mae the copy executable.
        chmod +x HealthAgent
    
  4. Change names in the agent script to the one we renamed it to.
        sed -i 's/generic_script/health_agent/g' health-agent
        sed -i 's/generic-script/health-agent/g' health-agent
        sed -i 's/Generic Script/Health Agent/'  health-agent
    

    We now have a Resource Agent that can run and manage a shell script. Arguments will be passed through the agent to the calling script that we supply it. Now we need to copy it over to each of the cluster nodes, install and test it.

  5. We can accomplish this fairly simple with a bash script such as the one below. Note I just whipped this up so may need tweaked.

        #!/bin/bash
        #
        # Assuming user is the same on each node
        #
    
        USAGE() {
            echo "./rlogin.sh    ..."
        }
    
        if [ "$#" -eq 0 ]; then
            USAGE
            exit 1
        fi
    
        read -p "Username: " user
    
        for server in "$@"
        do
          scp health-agent "$user"@"$server":/usr/lib/ocf/resource.d/heartbeat
        done
    
        exit 0
    
  6. Create a shell script for the resource manager to run, which will check the HDD status on the node.
    Here is a sample script that I use across my cluster nodes, that checks the HDD capacity, and returns status.

    
        #!/bin/bash
        # Check if physical hard drives are full
        # Return 1 if any drive is over tolerance (percent)
        # Return 0 if all drives are under tolerance (percent)
    
        TOLERANCE=5 #default to 1)print $0}')
        TEST="$((100 - $TOLERANCE))"
    
        while read -r line; do
            if [[ "$line" -gt "$TEST" ]]; then
                echo "drive is over tolerance"
                exit 1
            fi
        done <<< "$USED"
    
        echo "all drives passed"
        exit 0
    

    Save the bash script, make it executable, then SCP it over to all the servers. Then connect to each node, perform tests, and add resource if everything checks out.

  7. Test your agent using ocf-tester to catch any mistakes (on remote nodes). We want to do this on all nodes to ensure they are configured / have correct dependencies to run our script. Node: provide it with full path to script.

        ocf-tester -n /usr/lib/ocf/resource.d/heartbeat/health-agent
    
  8. Try executing agent in a shell and make sure it executes w/o any major errors. Again like previous example we should check each of the nodes.
        export OCF_ROOT=/usr/lib/ocf; bash -x /usr/lib/ocf/resource.d/heartbeat/health-agent start
    
  9. Add the resource to Pacemaker using pcs.
    This should be done on all nodes in cluster you want that resource agent to monitor on.

        pcs resource create health-agent ocf:heartbeat:health-agent script="full/path/to/script/to/run" state="/dev/shm" alwaysrun="yes" op monitor interval=60s
    
  10. To see status of cluster:
        pcs status
    

    Which should show your newly added resource agent and some additional status information that can be helpful in debugging.

    To show detailed information about only the health-agent resource run the following:

        pcs resource show health-agent
    

    You can also run resource agent action cmds with the same cmd. This can be useful to test if a certain action isn’t working properly.

        pcs resource debug-start health-agent
        pcs resource debug-stop health-agent
        pcs resource debug-monitor health-agent
    

Summary

I hope that helped clear up a few gotchas about cluster resource management. The OCF protocol is not very intuitive and small changes can completely ruin your previously working agents. Make sure to test, test, and test again. There is also a more sophisticated testing framework for OCF resource agents called: ocft which allows for testing environments, creating test cases, and much more. You can find that tool at Linux HA Hope you enjoyed this post, more awesomeness to follow!


For More Information

For more information, questions and comments visit us at:

dOpenSource
Flyball Labs

Written By:

DevOpSec
Software Engineer
Flyball Labs

Enabling Secure WebSockets: FreePBX 12 and sipML5

Assumptions:

  • Using chan_sip
  • Using Chrome as your WebRTC client
  • Asterisk 11.x
  • Using FreePBX 12.0.x
  • CentOS 6.x

Download sipML 5

sipML is the WebRTC Client that we are going to use. We need to download the repository

yum install git
cd /var/www/html/
git clone https://github.com/DoubangoTelecom/sipml5.git
chown -R asterisk:asterisk sipml5/

Enable SSL on Built-in HTTP Server of Asterisk

vim /etc/asterisk/http_custom.conf

tlsenable=yes
tlsbindaddr=0.0.0.0:8089
tlscertfile=/etc/pki/tls/certs/localhost.crt
tlsprivatekey=/etc/pki/tls/private/localhost.key

We also need to give asterisk permissions to read the tls certs

chown asterisk:asterisk /etc/pki/tls/certs/localhost.crt
chown asterisk:asterisk /etc/pki/tls/private/localhost.key

Enable Extension for Secure Web Sockets (WSS)

In older version of freepbx, they do not support wss transports, so this will need to be manually configured in /etc/asterisk/sip_custom.conf replacing SOME_EXTENSION and SOMESECRET. The important line is the transport=wss,udp,tcp,tls, which will have wss as the first entry. dtlscertfile and dtlsprivatekey will need to be pointed at the same key cert and key setup in http_custom.conf

[SOME_EXTENSION]
deny=0.0.0.0/0.0.0.0
secret=1234pccw
dtmfmode=rfc2833
canreinvite=no
context=from-internal
host=dynamic
trustrpid=yes
mediaencryption=yes
sendrpid=pai
type=friend
nat=force_rport,comedia
port=5060
qualify=yes
qualifyfreq=60
transport=wss,udp,tcp,tls
avpf=yes
force_avp=no
icesupport=yes
encryption=yes
callgroup=
pickupgroup=
dial=SIP/1103
permit=0.0.0.0/0.0.0.0
callerid=SOME_EXTENSION
callcounter=yes
faxdetect=no
cc_monitor_policy=generic
dtlsenable=yes
dltsverify=no
dtlscertfile=/etc/pki/tls/certs/localhost.crt
dtlsprivatekey=/etc/pki/tls/private/localhost.key

Configure sipML5 expert mode

Browse to https://<server-name>/sipml5. Make sure you include the https and click on the demo button. You should now be at a registration screen. Enter in the extension you would like to register as in the display name and private identity. The public identity will follow the following format:

sip:<Extensions>@<ip-address>

The password will be the secret set for your extensions and the realm will be the ip address or domain name of your server.

We also need to configure expert mode to set the wss address and stun settings.

Under expert mode, the WebSocket Server URL follows the following syntax:

wss://<ip-of-server>:8089/ws

Then set the ice server to the following google address:

[{stun.l.google.com:19302}]

Finally select Enable RTCWeb Breaker and hit save.

You should now be able to register to your extension. To troubleshoot, you can bring up the console in chrome by right clicking and selecting inspect. Additionally, make sure you have opened the necessary wss and rtp ports in your firewall (8089/tcp, 10000-20000/udp)

Start up two instances of Chrome and test

To make a call between two webrtc phones, you will need to install chromium, an open source version of the Google Chrome browser. You can alternatively use two computers with chrome installed. You can add a second extension in /etc/asterisk/sip_custom.conf following the same syntax as the previous extension. After an asterisk restart, you should be able to register to the new extension using the same methods and place a call between the two browsers.

Site-to-Site VPN Options Using AWS

We recently worked with a customer that had a requirement that their application needed to connect via Site-to-Site VPN to there clients application.  They had a few choices, but they decided to move there application to Amazon Web Services  (AWS) and connect to there clients datacenter from there.  Therefore we setup a Virtual Private Cloud (VPC) within Amazon and started down the path of setting up a Site-to-Site Virtual Private Network (VPN) connection.

There are multiple ways of implementing a VPN within Amazon as discussed here.  In most cases, it’s going to come down to using a AWS Hardware VPN or a Software VPN.  The AWS Hardware VPN can be configured within a couple clicks and it gives you the option to generate the configuration for multiple well known firewalls, which  you can use to configure your firewall or you can provide to your firewall administrator.  The Software VPN consists of running an EC2 instance that has software that implements VPN functionality.

The main factor in deciding AWS Hardware VPN versus Software VPN should be based on who’s initiating the traffic.  In our case, the customers application needed to initiate the request.  This means that we had to leverage the Software VPN approach because the AWS Hardware VPN can not initiate traffic.  It can only accept request.  So, it’s great for a company that wants to migrate systems from there datacenter to Amazon and then have there user access the systems. Hence, their users are the initiators of the traffic.

The installation and setup of a Software VPN isn’t really that difficult, but you have to have some basic understanding of how AWS networking works.  There are a few Software VPN implementations, but we selected OpenSWAN.  There’s a few good articles that we used.

One of the main gotcha’s in setting up OpenSwan are to ensure that the Access Control List (ACL) defined by the far end (the Router that you are establishing the VPN with) matches the Right side configuration parameter within the setup.  Once you read thru the above articles you will know what I mean.

The average time to setup an AWS Hardware VPN is 5 hours.  This includes configuration, testing and turn-up with the far end.

The average time to setup a Software VPN is 10-20 hours.  It really depends on the complexity of the Amazon VPC and how you need traffic to be routed and represented.

About dOpenSource

We provide Amazon Web Services (AWS) consulting with a focus on DevOPs and Infrastructure Migration.
We are proud to be based in Detroit, MI with coverage from 9am-8pm ET.  We have staff on the East and
West Coast.  You can purchase support from us by going to http://dopensource.com/shop

Setting up FreeSWITCH WebRTC functionality

This tutorial will go over how to setup WebRTC on FreeSWITCH using a certificate from letsencrypt. WebRTC is a protocol which allows voip calls to be conducted over a web browser without additional plugins or software. This tutorial will assume you are Debian 8, which is the recommended OS for production FreeSWTICH servers.

FreeSWITCH WebRTC encryption using letsencrypt

We will use letsencrypt to create tls certificates for our FreeSWITCH server and automate the renewal. WebRTC requires a valid tls certificate for security purposes, and letsencrypt is a cheap and easy way to obtain one.

echo "deb http://ftp.debian.org/debian jessie-backports main" >> /etc/sources.list
apt update && apt upgrade
apt install certbot -t jessie-backports
apt install apache2

You should now have the certbot package installed, and apache2 installed with the default configuration of /var/www/html as your root directory.

You will also want to update /etc/hosts and /etc/hostname to reflect the domain name you will be using.

in /etc/hosts append your hostname to the end of the 127.0.1.1 line

127.0.1.1 <somedomain-name>

and in /etc/hostname replace the current name with your hostname.

<somedomain-name>

Next, we will create our certificate. Execute the following command and fill out any necessary fields.

certbot certonly --webroot -w /var/www/html/ -d <somehostname>

You should see the following if it was successful.

 - Congratulations! Your certificate and chain have been saved at
   /etc/letsencrypt/live/pbx.somedomain.com/fullchain.pem. Your cert
   will expire on 2017-04-11. To obtain a new or tweaked version of
   this certificate in the future, simply run certbot again. To
   non-interactively renew *all* of your certificates, run "certbot
   renew"
 - If you lose your account credentials, you can recover through
   e-mails sent to root@pbx.somedomain.com.
 - Your account credentials have been saved in your Certbot
   configuration directory at /etc/letsencrypt. You should make a
   secure backup of this folder now. This configuration directory will
   also contain certificates and private keys obtained by Certbot so
   making regular backups of this folder is ideal.
 - If you like Certbot, please consider supporting our work by:

   Donating to ISRG / Let's Encrypt:   https://letsencrypt.org/donate
   Donating to EFF:                    https://eff.org/donate-le

Next, we need to setup the auto renewal with cron. These certificates expire every 90 days, and by default the certbot application will renew the certificate if it is within 30 days of expiring. I chose to run the command every week to be safe.

crontab -e
0 0 * * 7 certbot renew

Configuring SSL for HTTP

Since we are using SSL for WebRTC, might as well use the certificate to enable HTTPS on our server as well.

We need to enable the SSL module for Apache2. On Debian, you can issue this command.

sudo a2enmod ssl

Next we need to create a virtual host in /etc/apache2/sites-available/. Create a file named your new domain name in /conf

vim /etc/apache2/sites-available/pbx.somedomain.com.conf

Then include the following configuration. Note, you will need to point the SSL certificates to the correct directory depending on your domain. You will also need to change the ServerName parameter to whatever your domain name is.

<VirtualHost *:443>
        ServerName somedomain-name
        DocumentRoot /var/www/html
        SSLEngine on
        SSLProtocol all -SSLv3 -SSLv3
        SSLCompression off
        SSLHonorCipherOrder On
        SSLCipherSuite EECDH+AESGCM:EECDH+AES:EDH+AES

        SSLCertificateFile /etc/letsencrypt/live/pbx.somedomain.com/cert.pem
        SSLCertificateKeyFile /etc/letsencrypt/live/pbx.somedomain.com/privkey.pem
        SSLCertificateChainFile /etc/letsencrypt/live/pbx.somedomain.com/chain.pem

        ServerAdmin some-email@address.com

        ErrorLog ${APACHE_LOG_DIR}/error-devel.log
        CustomLog ${APACHE_LOG_DIR}/access-devel.log combined
        DirectoryIndex index.html
</VirtualHost>

Enable the new virtual host with a2ensite pbx.somedomain.com.conf. This will create a symlink from sites-available to sites-enabled. Then Restart Apache2 to enable these changes with systemctl restart apache2.

Installing FreeSWITCH

I chose to use the repository maintained by FreeSWITCH to simplify updates, but you can also compile from source if you wish. If you compiled from source, the FreeSWTICH configuration will be in /usr/local/freeswitch/conf/ instead of inside /etc/.

Use the following commands to setup the FreeSWITCH official repo and install the FreeSWITCH packages on Debian 8.

wget -O - https://files.freeswitch.org/repo/deb/debian/freeswitch_archive_g0.pub | apt-key add -
echo "deb http://files.freeswitch.org/repo/deb/freeswitch-1.6/ jessie main" > /etc/apt/sources.list.d/freeswitch.list
apt-get update && apt-get install -y freeswitch-meta-all git

We are going to want the source files later to copy over the verto js demo.

cd /usr/local/src/
git clone https://freeswitch.org/stash/scm/fs/freeswitch.git -bv1.6 freeswitch

Installing the java script dependencies for the verto demo.

This will install npm and other dependencies for the verto demo to run.

apt update
apt install npm nodejs-legacy
npm install -g grunt grunt-cli bower
npm install
bower --allow-root install
grunt build

Configuring FreeSWTICH

We are going to use the letsencrypt tls certificate we installed earlier for WebRTC. A combined key needs to be created from fullchain.pem and privkey.pem.

cat /etc/letsencrypt/live/somedomain.com/fullchain.pem /etc/letsencrypt/live/somedomain.com/privkey.pem > /etc/freeswitch/tls/wss.pem

Some changes will need to be made to the /etc/freeswitch/autoload_configs/verto.conf.xml file. I removed the ipv6 profile for simplicity.

<configuration name="verto.conf" description="HTML5 Verto Endpoint">

  <settings>
    <param name="debug" value="10"/>
    <!-- seconds to wait before hanging up a disconnected channel -->
    <!-- <param name="detach-timeout-sec" value="120"/> -->
    <!-- enable broadcasting all FreeSWITCH events in Verto -->
    <!-- <param name="enable-fs-events" value="false"/> -->
    <!-- enable broadcasting FreeSWITCH presence events in Verto -->
    <!-- <param name="enable-presence" value="true"/> -->
  </settings>

  <profiles>
    <profile name="somedomain">
      <param name="bind-local" value="0.0.0.0:8081"/>
      <param name="bind-local" value="0.0.0.0:8082" secure="true"/>
      <param name="force-register-domain" value="$${domain}"/>
      <param name="secure-combined" value="/etc/freeswitch/tls/wss.pem"/>
      <param name="secure-chain" value="/etc/freeswitch/tls/wss.pem"/>
      <param name="userauth" value="true"/>
      <param name="context" value="public"/>
      <param name="dialplan" value="XML"/>
      <!-- setting this to true will allow anyone to register even with no account so use with care -->
      <param name="blind-reg" value="false"/>
      <param name="mcast-ip" value="224.1.1.1"/>
      <param name="mcast-port" value="1337"/>
      <param name="rtp-ip" value="$${local_ip_v4}"/>
      <!--  <param name="ext-rtp-ip" value=""/> -->
      <param name="local-network" value="localnet.auto"/>
      <param name="outbound-codec-string" value="opus,vp8"/>
      <param name="inbound-codec-string" value="opus,vp8"/>

      <param name="apply-candidate-acl" value="localnet.auto"/>
      <param name="apply-candidate-acl" value="wan_v4.auto"/>
      <param name="apply-candidate-acl" value="rfc1918.auto"/>
      <param name="apply-candidate-acl" value="any_v4.auto"/>
      <param name="timer-name" value="soft"/>

    </profile>
  </profiles>
</configuration>

Uncomment the following line in /etc/freeswitch/directory/default.xml, or whatever directory you would like to be able to use mod_verto for WebRTC.

      <param name="jsonrpc-allowed-event-channels" value="demo,conference,presence"/>

Now we can copy over the demo verto client to our web server directory

cp -r /usr/local/src/freeswitch/html5/verto/demo/ /var/www/html/
chown -R www-data:www-data /var/www/html/

You should now be able to go to https://<your-domain-name>/demo and you will see the demo WebRTC interface. By default, this client will register to your FreeSWITCH server as extension 1008 with the default password. Because we are registered as a user in the Default directory, our calls will be processed by the default context. You can add some dialplan to test the setup in /etc/freeswitch/dialplan/default/ Such as the following (replace the playback data with the path to a sound file to play back. When dialing 12345, you should hear the audio file played back.)

<include>
  <extension name="verto_test">
    <condition field="destination_number" expression="^(12345)$">
             <action application="answer"/>
             <action application="log" data="INFO ********* VERTO WEBRTC CALL *******" />
             <action application="playback" data="path-to-some-sound-file.wav"/>
             <action application="hangup" />
    </condition>
  </extension>
</include>