Archives 2020

dSIPRouter Media Server API v1

We are introducing a new API that will enable the provisioning of extensions within a backend media server. The API will provide an abstraction layer for provisioning different backend media servers. The first release will focus on FusionPBX.

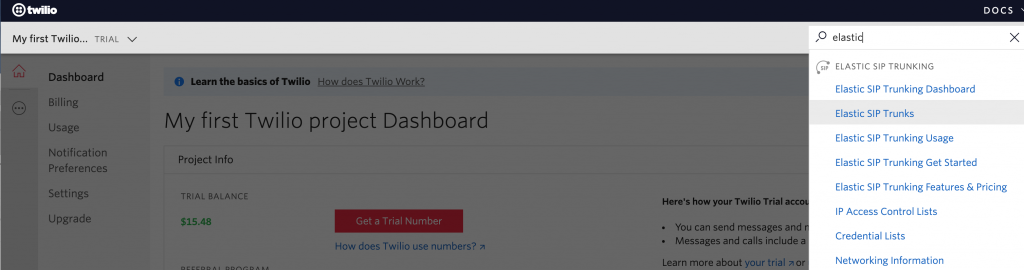
dSIPRouter has a concept of an Endpoint Group. An endpoint group can be mapped to a FusionPBX Cluster. When this happens the domains from FusionPBX is automatically sync’d with dSIPRouter. We will leverage the existing connection to enable the ability to provision and update Domains and Extensions within FusionPBX. In the future, we will support FreePBX and other media servers as well. Hence, giving users one API for provisioning users and dSIPRouter handles the complexity of translating the request into the backend media server.

The feature will be available in 0.642. You can provide comments and feedback on the API by submitting comments in the GitHub issue which can be found here

The API endpoints for this release are:

/mediaserver/domain/
/mediaserver/extension/

The Payload for this release:

Payload for Domain

{
   domain_id:
   name: string,
   enabled: boolean,
   description: string,
   config_id: endpointgroup_id | conf_id
}

Payload for Extension

{
    type: single| multiple,
    num_of_extensions: integer,
    attributes: {

      domain_id: string | null,
      account_code: string,
      extension: string,
      password: string|null ,
      outbound_caller_number: string|null,
      outbound_caller_name: string:null,
      vm_enabled: boolean,
      vm_password: string,
      vm_notify_email: string,
      enabled: boolean,
      config_id: endpointgroup_id | conf_id
    }
}

Example Usage

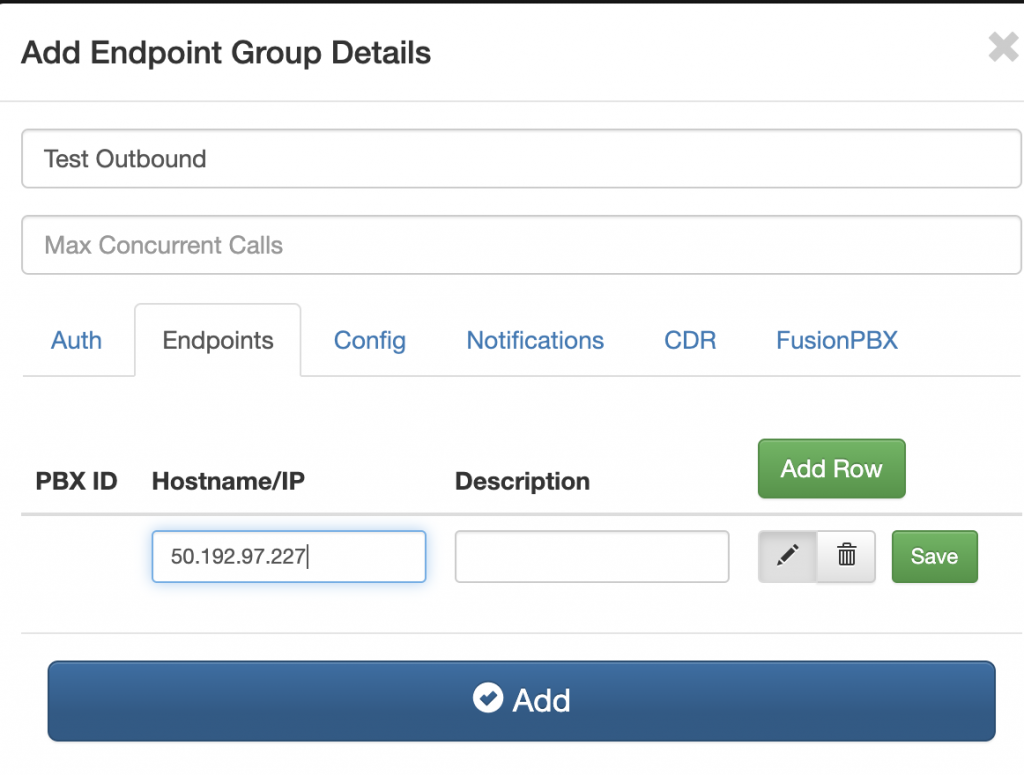
The following example will provision a new Endpoint Group in dSIPRouter and a Domain and Extension in FusionPBX. Note, that the API will also support updating and deleting as well.

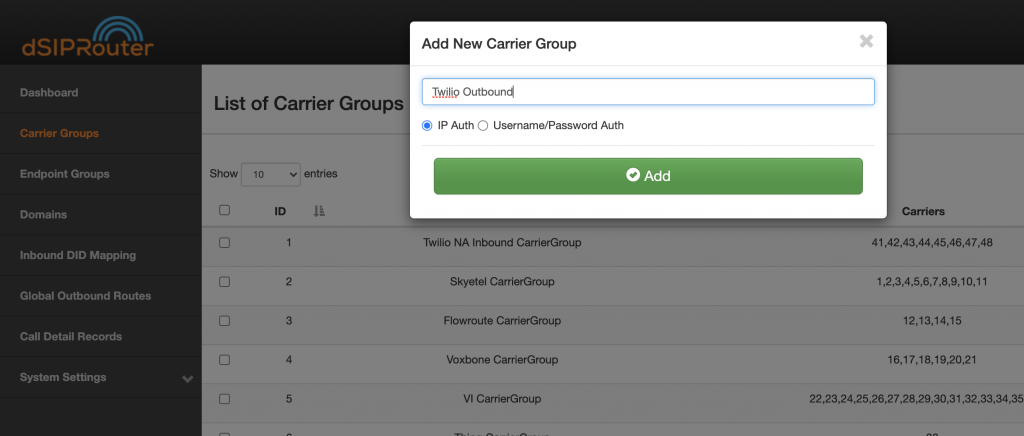
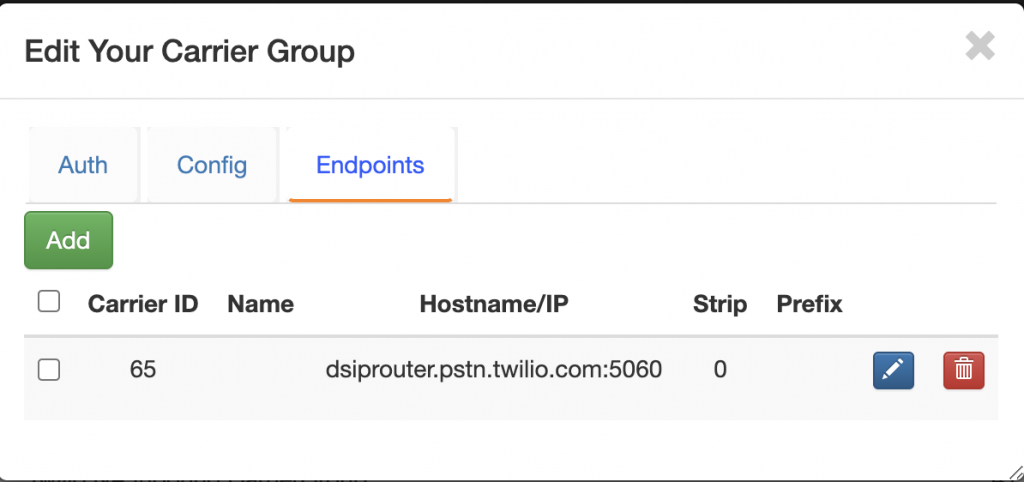
1) The user will create an endpoint group to represent a FusionPBX standalone instance or a FusionPBX cluster

https://{{DSIP_ADDR}}:5000/api/v1/endpointgroups

They will receive an endpoint group id, which will be used for provisioning the backend media server

2) The user can then create a new domain

https://{{DSIP_ADDR}}:5000/api/mediaserver/domain/

{
   domain_id: null
   name: AprilandMackCo,
   enabled: true,
   description: "April and Mack Co,
   config_id: 64
}

The user will receive the domain_id, let’s assume its 98

3) The user can create one user or a set of users. We are going to create 10 users

https://{{DSIP_ADDR}}:5000/api/mediaserver/extension/

{
    type: "multiple",
    num_of_extensions: 10,
    attributes: {

      domain_id: 98,
      account_code: "124-24245",
      extension: "1000",
      password: "starterpassword" ,
      outbound_caller_number: "8889072085",
      outbound_caller_name: "dOpenSource",
      vm_enabled: true,
      vm_password: "94145",
      vm_notify_email: "",
      enabled: true,
      config_id: 64
    }
}

This API will create 10 extensions starting from 1000 with the same attributes. You can also create a single extension.

Twilio Elastic SIP Trunking and dSIPRouter

dSIPRouter 0.63 was recently released with out of the box support for Twilio Elastic SIP Trunking. The design goal for the first release of this feature was to make it simple for a user to download dSIPRouter and setup Twilio as the carrier.

Assumptions:

  • dSIPRouter is installed. If not, you can install it within 12 minutes. There is a one-line command that will kick-off the installer and it will take about 12 minutes to install. The details can be found here{:target=”_blank”}

  • You have a Twilio account. It only takes a few minutes to create an account. You can create an account by going here

Setting up Twilio Elastic SIP Trunking

  1. Login to Twilio
  2. Enter Elastic SIP Trunks in the top right search bar and click enter.  Notice that Twilio gives you a double digit Trial Balance.  This is better then most SIP providers that I worked with in the past.

  3. Click the + sign to create a new SIP Trunk.  Enter a name for your SIP Trunk and click “Create”

  4. You will see a screen that looks like this

  5. Since we are focused on sending calls outbound we are going to click on the “Termination” menu option.  We are going to use IP Authentication.  So, we just need to define a unique SIP URI for signaling to Twilio. Twilio doesn’t accept SIP requests that come from an IP address.  Also, we need to define an Access Control List that contains the IP address of your dSIPRouter instance.  If you have multiple instances of dSIPRouter then define all of the IP addresses.

This is all we need to do on the Twilio side.  In the next section we will focus on configuring dSIPRouter

Setting up dSIPRouter to work with Twilio Elastic SIP Trunking

Setting up the Carrier Group

  1. Login to dSIPRouter
  2. Click Carrier Groups
  3. Click Add
  4. Provide a name for the Carrier Group and click Add

  5. Click on the Carrier Group that you just added

  6. Click on Endpoint and click Add.
  7. Enter the Twilio SIP URI that you defined in the Twilio portal

  8. Click “Reload Kamailio”

Make the Twilio Carrier Group the Default Outbound Carrier

  1. Click on Global Outbound Routes
  2. Click on the Default Outbound Route and select Twilio Outbound

Making an Outbound Call

In this section we are going to use IP authentication to send a call using a softphone.

  1. Click Endpoint Groups
  2. Click Add enter “Test Endpoint” as the Friendly Name
  3. Click the Endpoint Tab and enter the IP address you will send calls from
  4. Click Add

  5. Click “Reload Kamailio”

  6. Start your softphone and configure it to send a call to dSIPRouter

Configuring Yealink W60P Cordless DECT IP Phone

The purpose of this tutorial is to explain how to configure the Yealink W60P Cordless DECT IP Phone with FreePBX, Asterisk of FusionPBX.  We will assume that you have the extension already configured in one of the aforementioned systems.  Therefore, we will focus on the steps needed to configure the phone.

I must note that the experience with configuring the Yealink W60P was much better then configuring the Panasonic KX-TGP600

The high-level steps needed to complete this are listed below.  We will go into detail for each section.

  • Locate Web Management UI IP Address
  • Log into theWeb Management UI
  • Configure the phone settings via the Web Management UI

Locate Web Management UI IP Address

  1. Pickup one of the Handsets that is registered to the base station
  2. Click OK
  3. Click OK on the (i) Icon
  4. Click OK on the BASE option
  5. The IP address of the Web Management UI (aka Base station) will be shown

Log into theWeb Management GUI

  1. Open a web browser
  2. Enter http://<IP address of the Web Management UI>
  3. Enter admin/admin as the username and password

Configure the phone settings via the Web Management GUI

  1. Click Account
  2. Select the Account you want to configure.  We will use Account1
  3. Enter in the following required and optional fields:

Required Fields

Line Action
Label
Display Name
Register Name
Username Name
Password

Optional Fields
These fields are only needed if you have a proxy server in front of your media server such as Kamailio or OpenSIP’s

Enable Outbound Proxy Server
Outbound Proxy Server 1