Creating a Docker file
The recommended way to create images for sharing is from a docker file. A docker file is essentially a script which can recreate the building of your image. We will go over how to create one for nginx on CentOS in this tutorial.
Creating the docker file.
It is recommended that each docker file is contained in a separate directory. This will help keep everything organized and give you a place to store any extra files if needed.
- Create a new directory for your docker build file.
mkdir nginx_docker - Create the docker file
cd nginx_docker
vim Dockerfile
Dockerfile format
The dockerfile format is fairly straightforward. Each line has an instruction and argument. You can read more about instructions and arguments in the dockerfile reference documentation
In this tutorial we will be using the following instructions:
FROM
RUN
ADD
EXPOSE
CMD
FROM
The FROM instruction specifies the base image to use as a foundation to our new image. In our example, we will be using the official CentOS image from our previous tutorials. The FROM instruction needs to be the first instruction in your Dockerfile, as it is the environment all subsequent instructions will be ran in.
- Add the following to the beginning of your Dockerfile to use the official CentOS 7 image from the Docker Hub.
FROM centos:7
RUN
The RUN instruction will run a command in your image environment. By default, any arguments will be ran in shell. Each argument is technically passing the following command to the environment.
/bin/sh -c <argument>
- We need to run the necessary commands to install nginx on our CentOS environment. This will include:
- Installing epel-release
- Updating to notify yum of the new repository
- Installing nginx.
- Add the following to your Dockerfile on the line after the
FROMinstruction:RUN yum -y install epel-release RUN yum -y update RUN yum -y install nginx
ADD
The ADD instruction copies files to the image’s file system. This is useful for adding configuration files, scripts, or any other files needed in your environment. We will create a sample html file to add to the nginx root directory.
- First we will need to create a basic html file in our Dockerfile directory.
printf "<header>\n <h1>Docker ADD is neat</h1>\n</header>" > html- This will create a file called
html, and show look like this:
<header> <h1>Docker ADD is neat</h1> </header> - This will create a file called
- Add the following to your Dockerfile on the line after the last
RUNinstruction:ADD index.html /usr/share/nginx/html/index.html
EXPOSE
The EXPOSE instruction tells docker which network ports the container will listen on. We are setting up an http server, so we will need to have the container listen on port 80/tcp.
- Add the following to your Dockerfile on the line after the
ADDinstruction:EXPOSE 80/tcp
CMD
Finally, we need to tell docker what command to run when the container is started up with the CMD instruction. The argument for this instruction will differ depending on what application you want your container to run. In this example, we will start nginx in non-daemon mode, so that when we attach to the running container, we will see the nginx console.
- The
CMDsyntax is as follows:CMD ["executable","param1","param2"] - Add the following to your Dockerfile after the
EXPOSEinstruction:CMD ["nginx", "-g daemon off;"]
Finished Dockerfile
When you are finished, your docker file should look something like this.
FROM centos:7
RUN yum -y install epel-release
RUN yum -y update
RUN yum -y install nginx
ADD index.html /usr/share/nginx/html/index.html
EXPOSE 80/tcp
CMD ["nginx", "-g daemon off;"]
Building the Image
Now that we have a docker file and any needed files in our directory, it is time to build the image. From within the docker file directory, execute the following:
docker build -t dopensource/nginx .
- This will run each instruction in your docker file sequentially, and create a local docker image called dopensource/nginx.
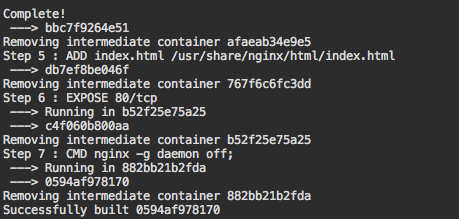
- You will see each instruction executed in your console, which is very helpful for debugging any issues with your build file.
- Here is what the end of my build process looks like.
Running your new image.
Now that you have built your image, it is time to run the image as a new docker container. Remember, we will need to expose port 80 in our run command and specify which port on the host to bind to.
docker run -dit -p 8081:80 dopensource/nginx
- This will run our new image, and bind the container’s port 80 to our host’s port 8081.
- Browse to your docker hosts ip adress, specifying port 8081. You should see the basic html header we created prior.
http://<host_ip_addr>:8081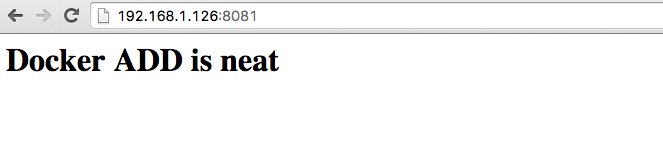
References
https://docs.docker.com/engine/reference/builder/