Blog

SIPp – Load Testing FreeSWITCH

In this article we will go over how to get SIPP installed and start up a basic load test for FreeSWITCH.

Installing SIPp

We recommend installing SIPp to a different machine than where you are running FreeSWITCH. This will provide the most realistic stress test. You can download SIPP here: https://sourceforge.net/projects/sipp/files/sipp/3.4/

Run the following commands once you have the SIPp tar downloaded to get it compiled.

tar -xzf sipp-3.3.990.tar.gz
cd sipp-3.3.990
apt install libncurses6-dev libncurses6
./configure; make

If you are on Debian 8, You will need to install the following ncurses libraries instead:

apt install libncurses5-dbg libncurses5 libncurses

SIPp will now be installed in the directory you ran the make command in.

FreeSWITH Dialplan

We will create a basic extension in FreeSWITCH to process the sip traffic we will be sending via SIPp.

vim dialplan/public/0000000_sipp.xml

<include>
  <extension name="sipp_test">
    <condition field="destination_number" expression="^(9999999)$">
    <action application="answer"/>
    <action application="playback" data="ivr/ivr-welcome_to_freeswitch.wav"/>
    <action application="hangup"/>
    </condition>
  </extension>
</include>

Once you have this configured, give FreeSWITCH the reloadxml command:

fs_cli -x 'reloadxml'

This will create the extension sipp_test in the public context, which is listening for incoming traffic to the number 9999999. Freeswitch will playback an ivr message to every calling matching this number.

Next we will want to make sure our SIPp server is able to reach FreeSWITCH on the sip and rtp ports. Run the following iptables commands:

iptables -A INPUT -p udp --dport 5080 -s -j ACCEPT
iptables -A INPUT -p udp -m multiport --dports 16384:32768 -s -j ACCEPT

SIPp Testing

We are going to need a scenario file. You can paste the following into an xml file called uac.xml

<?xml version="1.0" encoding="ISO-8859-1" ?>
<!DOCTYPE scenario SYSTEM "sipp.dtd">

<!-- This program is free software; you can redistribute it and/or      -->
<!-- modify it under the terms of the GNU General Public License as     -->
<!-- published by the Free Software Foundation; either version 2 of the -->
<!-- License, or (at your option) any later version.                    -->
<!--                                                                    -->
<!-- This program is distributed in the hope that it will be useful,    -->
<!-- but WITHOUT ANY WARRANTY; without even the implied warranty of     -->
<!-- MERCHANTABILITY or FITNESS FOR A PARTICULAR PURPOSE.  See the      -->
<!-- GNU General Public License for more details.                       -->
<!--                                                                    -->
<!-- You should have received a copy of the GNU General Public License  -->
<!-- along with this program; if not, write to the                      -->
<!-- Free Software Foundation, Inc.,                                    -->
<!-- 59 Temple Place, Suite 330, Boston, MA  02111-1307 USA             -->
<!--                                                                    -->
<!--                 Sipp default 'uac' scenario.                       -->
<!--                                                                    -->

<scenario name="Basic Sipstone UAC">
  <!-- In client mode (sipp placing calls), the Call-ID MUST be         -->
  <!-- generated by sipp. To do so, use [call_id] keyword.                -->
  <send retrans="500">
    <![CDATA[

      INVITE sip:[service]@[remote_ip]:[remote_port] SIP/2.0
      Via: SIP/2.0/[transport] [local_ip]:[local_port];branch=[branch]
      From: sipp <sip:sipp@[local_ip]:[local_port]>;tag=[pid]SIPpTag00[call_number]
      To: [service] <sip:[service]@[remote_ip]:[remote_port]>
      Call-ID: [call_id]
      CSeq: 1 INVITE
      Contact: sip:sipp@[local_ip]:[local_port]
      Max-Forwards: 70
      Subject: Performance Test
      Content-Type: application/sdp
      Content-Length: [len]

      v=0
      o=user1 53655765 2353687637 IN IP[local_ip_type] [local_ip]
      s=-
      c=IN IP[media_ip_type] [media_ip]
      t=0 0
      m=audio [media_port] RTP/AVP 0
      a=rtpmap:0 PCMU/8000

    ]]>
  </send>
  <recv response="100"
        optional="true">
  </recv>

  <recv response="180" optional="true">
  </recv>

  <recv response="183" optional="true">
  </recv>

  <!-- By adding rrs="true" (Record Route Sets), the route sets         -->
  <!-- are saved and used for following messages sent. Useful to test   -->
  <!-- against stateful SIP proxies/B2BUAs.                             -->
  <recv response="200" rtd="true">
  </recv>

  <!-- Packet lost can be simulated in any send/recv message by         -->
  <!-- by adding the 'lost = "10"'. Value can be [1-100] percent.       -->
  <send>
    <![CDATA[

      ACK sip:[service]@[remote_ip]:[remote_port] SIP/2.0
      Via: SIP/2.0/[transport] [local_ip]:[local_port];branch=[branch]
      From: sipp <sip:sipp@[local_ip]:[local_port]>;tag=[pid]SIPpTag00[call_number]
      To: [service] <sip:[service]@[remote_ip]:[remote_port]>[peer_tag_param]
      Call-ID: [call_id]
      CSeq: 1 ACK
      Contact: sip:sipp@[local_ip]:[local_port]
      Max-Forwards: 70
      Subject: Performance Test
      Content-Length: 0

    ]]>
  </send>

  <!-- This delay can be customized by the -d command-line option       -->
  <!-- or by adding a 'milliseconds = "value"' option here.             -->
  <pause/>

  <!-- The 'crlf' option inserts a blank line in the statistics report. -->
  <send retrans="500">
    <![CDATA[

      BYE sip:[service]@[remote_ip]:[remote_port] SIP/2.0
      Via: SIP/2.0/[transport] [local_ip]:[local_port];branch=[branch]
      From: sipp <sip:sipp@[local_ip]:[local_port]>;tag=[pid]SIPpTag00[call_number]
      To: [service] <sip:[service]@[remote_ip]:[remote_port]>[peer_tag_param]
      Call-ID: [call_id]
      CSeq: 2 BYE
      Contact: sip:sipp@[local_ip]:[local_port]
      Max-Forwards: 70
      Subject: Performance Test
      Content-Length: 0

    ]]>
  </send>

  <recv response="200" crlf="true">
  </recv>

  <!-- definition of the response time repartition table (unit is ms)   -->
  <ResponseTimeRepartition value="10, 20, 30, 40, 50, 100, 150, 200"/>

  <!-- definition of the call length repartition table (unit is ms)     -->
  <CallLengthRepartition value="10, 50, 100, 500, 1000, 5000, 10000"/>

</scenario>

We can now run the following command to start the SIPp load test. This will start up an ncurses graph to show you the progress.

sipp -sf uac.xml -s 9999999 :5080 -trace_msg -l 15 -d 60000

In the next tutorial we will go over how to analyze FreeSWITCH’s memory management with valgrind while under a stress test.

FreeSWITCH, configuring the Callcenter Module

We will go over how to setup the call center module. The callcenter module is used for creating an inbound queue for connecting inbound callers with agents registered to your system. We will be assuming you followed our FreeSWITCH setup tutorial here

MOH dependency

Make sure you have installed the moh sounds, which on debian is done with apt install freeswitch-music-default.

callcenter.conf.xml

You will first need to make sure the callcenter module is enabled in modules.conf

    <load module="mod_callcenter"/>

Next open up autoload_configs/callcenter.conf.xml. A default queue is provided, which we will make some modifications to.

    <queue name="test@default">
      <param name="strategy" value="longest-idle-agent"/>
      <param name="moh-sound" value="$${hold_music}"/>
      <param name="time-base-score" value="system"/>
      <param name="max-wait-time" value="0"/>
      <param name="max-wait-time-with-no-agent" value="0"/>
      <param name="max-wait-time-with-no-agent-time-reached" value="5"/>
      <param name="tier-rules-apply" value="false"/>
      <param name="tier-rule-wait-second" value="300"/>
      <param name="tier-rule-wait-multiply-level" value="true"/>
      <param name="tier-rule-no-agent-no-wait" value="false"/>
      <param name="discard-abandoned-after" value="60"/>
      <param name="abandoned-resume-allowed" value="false"/>
    </queue>

Now we need to add an agent.

<agent name="1000@default" type="callback" contact="[call_timeout=10]user/1000" status="Available" max-no-answer="3" wrap-up-time="10" reject-delay-time="10" busy-delay-time="60" />

And specify the agent’s tier, which also puts them into the queue.

   <tier agent="1000@default" queue="test@default" level="1" position="1"/>

We can now send inbound calls to our callcenter queue in our dialplan.

<include>
  <extension name="test_ivr">
   <condition field="destination_number" expression="^(test_ivr)$">
     <action application="set" data="accountcode=test_in"/>
     <action application="callcenter" data="test@default"/>
     <action application="hangup"/>
   </condition>
  </extension>
</include>

FreeSWITCH custom CDR guide and dividing CDR logs by accountcode

We will be configuring the cdr_csv module to log all calls going through a specific extension to a seperate file. This is useful if you would like to monitor all calls hitting a certain extension in your dialplan without having to dig through the master CDR file. We will assume that you have setup your FreeSWITCH system using our previous tutorial, FreeSWITCH 1.6 Quick Install Guide for Debian Jessie

CDR

First make sure the mod_cdr_csv module is uncommented in /etc/freeswitch/autoload_configs/modules.conf

    <load module="mod_cdr_csv"/>

Next we need to create a new template in /etc/freeswitch/autoload_configs/cdr_csv.conf.xml. Note that the template will need to be named the same as whatever account code you decide to use in your dialplan later. When an accountcode matches a template name, FreeSWITCH will create a unique CDR file for all calls specified as that accountcode.

    <template name="test_in">"${caller_id_number}","${start_stamp}","${answer_stamp}","${end_stamp}","${accountcode}"</template>

This template will log the caller id, start of call time, answer time, end of call time, and accountcode name to test_in.csv in the log-base directory, which defaults to /var/log/freeswitch/cdr-csv/ You can find a list of cdr variables here

Dialplan

Now in your dialplan you will need to set the accountcode. In my dialplan, I am bridging to a user once it hits my default context, which is where I decided to set the account code. Below you will see the accountcode set before the call is bridged to the 1000 user.

     <action application="set" data="accountcode=test_in"/>
     <action application="bridge" data="USER/1000@default"/>

You will need to reload FreeSWITCH after making these changes. If you are on Debian 8, you can run systemctl restart freeswitch. Once FreeSWITCH is reloaded you should see a seperate CDR file at /var/log/freeswitch/cdr-csv/test_in.csv, which will only contain calls flagged with the accountcode test_in.

FreeSWITCH 1.6 Quick Install Guide for Debian Jessie

Our Goal

There’s a lot of FreeSWITCH material out on the web.  Our goal is to provide you a concise document that provides the necessary steps or scripts to install the latest stable release of FreeSWITCH.

What is FreeSWITCH

FreeSWITCH is an OpenSource VoIP platform that enables you to build communication platforms that span from a simple PBX to a sophisticated backend communication framework that allows thousands of calls to interconnect per second.

Assumptions

  • Debian Jessie is installed
  • You have root or sudo access via the CLI

Let’s Install (with Explanation of each command)

  • Install Public Key: We need to install the FreeSWITCH public key so that we validate the packages that we are going to install came from FreeSWITCH.org and was not tampered with.
    wget -O - https://files.freeswitch.org/repo/deb/debian/freeswitch_archive_g0.pub | apt-key add -
    
  • Setup Repository: Setup the Debian repository file with the necessary configuration to download the FreeSWITCH packages
    echo "deb http://files.freeswitch.org/repo/deb/freeswitch-1.6/ jessie main" > /etc/apt/sources.list.d/freeswitch.list 
    
  • Install the Packages: We will first update our local repository using apt-get update, which will obtain the metadata of the FreeSWITCH packages since we just added the FreeSWITCH repository. It will also update the metadata for other repositories as well. Lastly, we will install FreeSWITCH using the apt-get install -y freeswitch-meta-all command
    apt-get update && apt-get install -y freeswitch-meta-all
    
  • Secure the Extensions: By default all of the extensions have a password of 1234. FreeSWITCH will warn you that all extensions are using a default password of 1234 and ask that you change it by putting an entry in the /var/log/freeswitch/freeswitch.log file. Also, it will delay any outbound calls for a few seconds. You can change the default password by running these commands.
    sed -i "s/1234/10082013/" /etc/freeswitch/vars.xml
    fs_cli -x reloadxml
    

    Where the extension passwords will now be 10082013. You can change the default password by just replacing 10082013 with your password.

Register SIP Phones

Now we can validate that the install was successful. We can do this by registering 1 or more SIP phones. The default install of FreeSWITCH comes with a set of users. Let’s register extension 1000 and 1001 with two separate VoIP phones and make calls between the sip phones. Remember that your password for each extension is 10082013 or whatever you manually changed it too.

Installing Asterisk 14 on Debian 8

In this article we will go over how to compile the asterisk 14 beta. There are a few new features to play with in this new release.

I recommend bringing your system up to date before trying out the new version of asterisk.

apt update && apt upgrade

Now we need to make sure we have all the dependencies for asterisk and the capability of compiling new software.

apt install build-essential openssl libxml2-dev libncurses5-dev uuid-dev sqlite3 libsqlite3-dev pkg-config libjansson-dev

I like to put all my source code I plan on compiling in /usr/local/src, so we will start out by downloading the source and un taring.

cd /usr/local/src/
wget http://downloads.asterisk.org/pub/telephony/asterisk/asterisk-14.0.0-beta2.tar.gz
tar -xzf asterisk-14.0.0-beta2.tar.gz
cd asterisk-14.0.0-beta2/

Now we can compile asterisk.

./configure
make
make install 
make samples

Once asterisk is finished you should have an asterisk binary in /usr/sbin/asterisk

root@asterisk-14-deb:/etc/asterisk# whereis asterisk
asterisk: /usr/sbin/asterisk /usr/lib/asterisk /etc/asterisk /usr/include/asterisk /usr/include/asterisk.h /usr/share/man/man8/asterisk.8

The configuration files are stored in /etc/asterisk/

Let’s start by adding some users to register as in /etc/asterisk/sip.conf. Add the following at the end of the file.

[100]
type=friend
username=100
secret=somenewsecret
context=test
host=dynamic
qualify=yes

[101]
type=friend
username=101
secret=somenewsecret
context=test
host=dynamic
qualify=yes
  • You should replace the secret with some other long hash.

In /etc/asterisk/extensions.conf we need to add a dialplan to route calls to these new users.

Add the following at the end of /etc/asterisk/extensions.conf

[test]
exten => 100,1,Dial(SIP/100)
exten => 101,1,Dial(SIP/101)
  • This is creating a new context, test and allowing either phone to dial each other.

Setup systemd for Asterisk.

We will first want to create a user to run asterisk as. It is generally a good idea to not run processes as root unless you need to.

useradd -r -s /bin/false asterisk

We will also need to give the asterisk user permissions over the needed directories.

chown -R asterisk /etc/asterisk/
chown -R asterisk /var/lib/asterisk/
chown -R asterisk /var/run/asterisk/
chown asterisk /usr/sbin/asterisk
chown -R asterisk /var/log/asterisk/

Create a new file at /etc/systemd/system/asterisk.service

vim /etc/systemd/system/asterisk.service

and add the following.

[Unit]
Description=Asterisk PBX And Telephony Daemon
After=network.target

[Service]
User=asterisk
Group=asterisk
Environment=HOME=/var/lib/asterisk
WorkingDirectory=/var/lib/asterisk
ExecStart=/usr/sbin/asterisk -f -C /etc/asterisk/asterisk.conf
ExecStop=/usr/sbin/asterisk -rx 'core stop now'
ExecReload=/usr/sbin/asterisk -rx 'core reload'

[Install]
WantedBy=multi-user.target

We should now be able to control asterisk via systemd. To start asterisk issue the following.

systemctl start asterisk

and to make asterisk start when the server boots

systemctl enable asterisk

You should now be able to register your phones to extension 100 and 101 on your new Asterisk 14 server. Once registered, you can connect to the asterisk console with asterisk -rv.

asterisk -rv
asterisk-14-deb*CLI> sip show peers
Name/username             Host                                    Dyn Forcerport Comedia    ACL Port     Status      Description                      
100/100                   192.168.1.10                            D  Auto (Yes) No             5060     OK (45 ms)                                   
101/101                   (Unspecified)                            D  Auto (No)  No             0        UNKNOWN                                      
2 sip peers [Monitored: 1 online, 1 offline Unmonitored: 0 online, 0 offline]
asterisk-14-deb*CLI>

A2BIlling RESTFUL API: Installing and Configuring

We were recently hired to customize the core A2Billing project to meet some custom business rules and they wanted to use the A2Billing Restful API to integrate A2Billing with other systems in their environment.  There are a lot of blog posts on how to install and configure the core A2Billing project, but very little info on the Restful API.  Therefore, I will explain how to configure it with the assumption that A2Billing is already installed and configured.  I will use CentOS 7 to demonstrate how to set it up.   If you need help you can hire us by purchasing support time.

Assumptions:

  • CentOS  6 or 7 is being used
  • A2Billing version 2.2.0 is already installed and working

Architecture and Background

The A2Billing Restful API is developed by Star2Billing, the same company that develops A2Billing.   It’s built using Python and Flask.  Flask has a number of components, but the main components used is the RESTful request dispatching.  The bits are located on GitHub at https://github.com/areski/a2billing-flask-api.  The install script is only supported on Debian, but most of our customers use A2Billing with the FreePBX on CentOS.  Therefore, we will focus on installing it on CentOS.

Installation Steps

Download the bits from github

cd /usr/src
git clone https://github.com/areski/a2billing-flask-api
cd a2billing-flask-api

Install the required libraries

There are a number of Python libraries needed.  The included makefile contains the commands to install the libraries.  The list of libraries can be found in a file called “requirements.txt” if are really interested in what libraries are being used. Execute make to install.

If running Python < 2.7.9

wget https://bootstrap.pypa.io/get-pip.py 
python get-pip.py
pip install -r requirements.txt
pip install virtualenv
make

Modify the Activation Script

Change path on the activate_this and sys.path lines to reflect the actual location of the a2billing-flask-api

vi a2billing-flash-api/a2billing-flask-app.wsgi
import os
import sys
activate_this = '/usr/src/a2billing-flask-api/a2billing_flask_api_env/bin/activate_this.py'
execfile(activate_this, dict(__file__=activate_this))
apache_configuration= os.path.dirname(__file__)
project = os.path.dirname(apache_configuration)
workspace = os.path.dirname(project)
sys.path.append(workspace)

sys.path.insert(0, '/usr/src/a2billing-flask-api/a2billing_flask_api/lib/python2.6/site-packages')
sys.path.insert(1, '/usr/src/a2billing-flask-api/a2billing_flask_api/lib/python2.7/site-packages')
sys.path.append('/usr/share')
sys.path.append('/usr/src/a2billing-flask-api/a2billing_flask_api')

# os.environ['DJANGO_SETTINGS_MODULE'] = 'newfies_dialer.settings'
# import django.core.handlers.wsgi
# application = django.core.handlers.wsgi.WSGIHandler()

from a2billing_flask_api import app as application

Installed the WSGI Plugin for Apache

The A2Billing Flask API depends on Flask API (surprise).  In order to get Flask to execute within your Apache server you need the WSGI Plugin

yum install mod_wsgi

For Apache 2.2

Listen 9090
WSGISocketPrefix /var/run/wsgi
<VirtualHost *:9090>
ServerName api-a2billing.dopensource.com

WSGIDaemonProcess a2billing_flask_app user=asterisk group=asterisk threads=5
WSGIScriptAlias / /usr/src/a2billing-flask-api/a2billing_flask_api/a2billing_flask_app.wsgi
WSGIPassAuthorization On

<Directory /usr/src/a2billing-flask-api>
WSGIProcessGroup a2billing_flask_app
WSGIApplicationGroup %{GLOBAL}
Order deny,allow
Allow from all
</Directory>
ErrorLog "/var/log/httpd/a2billing-flask.log"
</VirtualHost>

For Apache 2.4

Listen 9090
WSGISocketPrefix /var/run/wsgi
<VirtualHost *:9090>
ServerName api-a2billing.dopensource.com

WSGIDaemonProcess a2billing_flask_app user=asterisk group=asterisk threads=5
WSGIScriptAlias / /usr/src/a2billing-flask-api/a2billing_flask_api/a2billing_flask_app.wsgi
WSGIPassAuthorization On

<Directory /usr/src/a2billing-flask-api>
WSGIProcessGroup a2billing_flask_app
WSGIApplicationGroup %{GLOBAL}
# Order deny,allow
# Allow from all
<strong>Require all granted</strong>
</Directory>
ErrorLog "/var/log/httpd/a2billing-flask.log"
</VirtualHost>

Setup the database configuration parameters.

The database configuration information is located in a file called config.py.

vi a2billing_flask_api/config.py

change the name (database name), user and passwd parameters based on your A2Billing Installation

DATABASE = {
'name': 'mya2billing',
'engine': 'peewee.MySQLDatabase',
'user': 'a2billinguser',
'passwd': 'a2billing',
}

Start Web Server and Test

service httpd restart

Test it locally:

curl -u admin:admin http://localhost:9090/api/callerid/

Test it from a Remote System:

curl -u admin:admin http://<external ip>:9090/api/callerid/

You should get a list of calling card id’s

If you have any problems look in /var/log/httpd/a2billing-flask.log

Let me know if you have issues with these instructions and I will fix them.


Autoscaling an Asterisk Cluster Using Docker Images – Part 1: Setting Up the Plumbing

Series Intro

This series of articles will give you the information you need to standup a cluster of Asterisk servers using Docker containers, which we categorize as media servers where traffic will be load balanced by Kamailio.

Part I Intro

In this article we will configure the plumbing of the cluster and deploy a couple of Asterisk containers (media servers). At the end of this article you will understand how to setup a basic Docker cluster that can automatically discover and auto register Asterisk servers to the cluster.

Bootstrapping the Cluster

Let’s start by setting up the main components of the cluster. We will use Consul, which was developed by HashiCorp to provide the plumping for our cluster. This plumbing includes Service Discovery, DNS, Event notification and other services that we may discuss later on in this series. The documentation for Consul can be found at <https://www.consul.io/docs/index.html>

The prerequisite is to have docker installed

We can start the cluster by running:

docker run -d -p 0.0.0.0:8400:8400 -p 0.0.0.0:8500:8500 -p 0.0.0.0:8600:8600/udp --volume=/var/run/docker.sock:/tmp/docker.sock --name consul -h voiphost1 docker.io/consul agent -ui -server -bootstrap-expect 1 -client 0.0.0.0

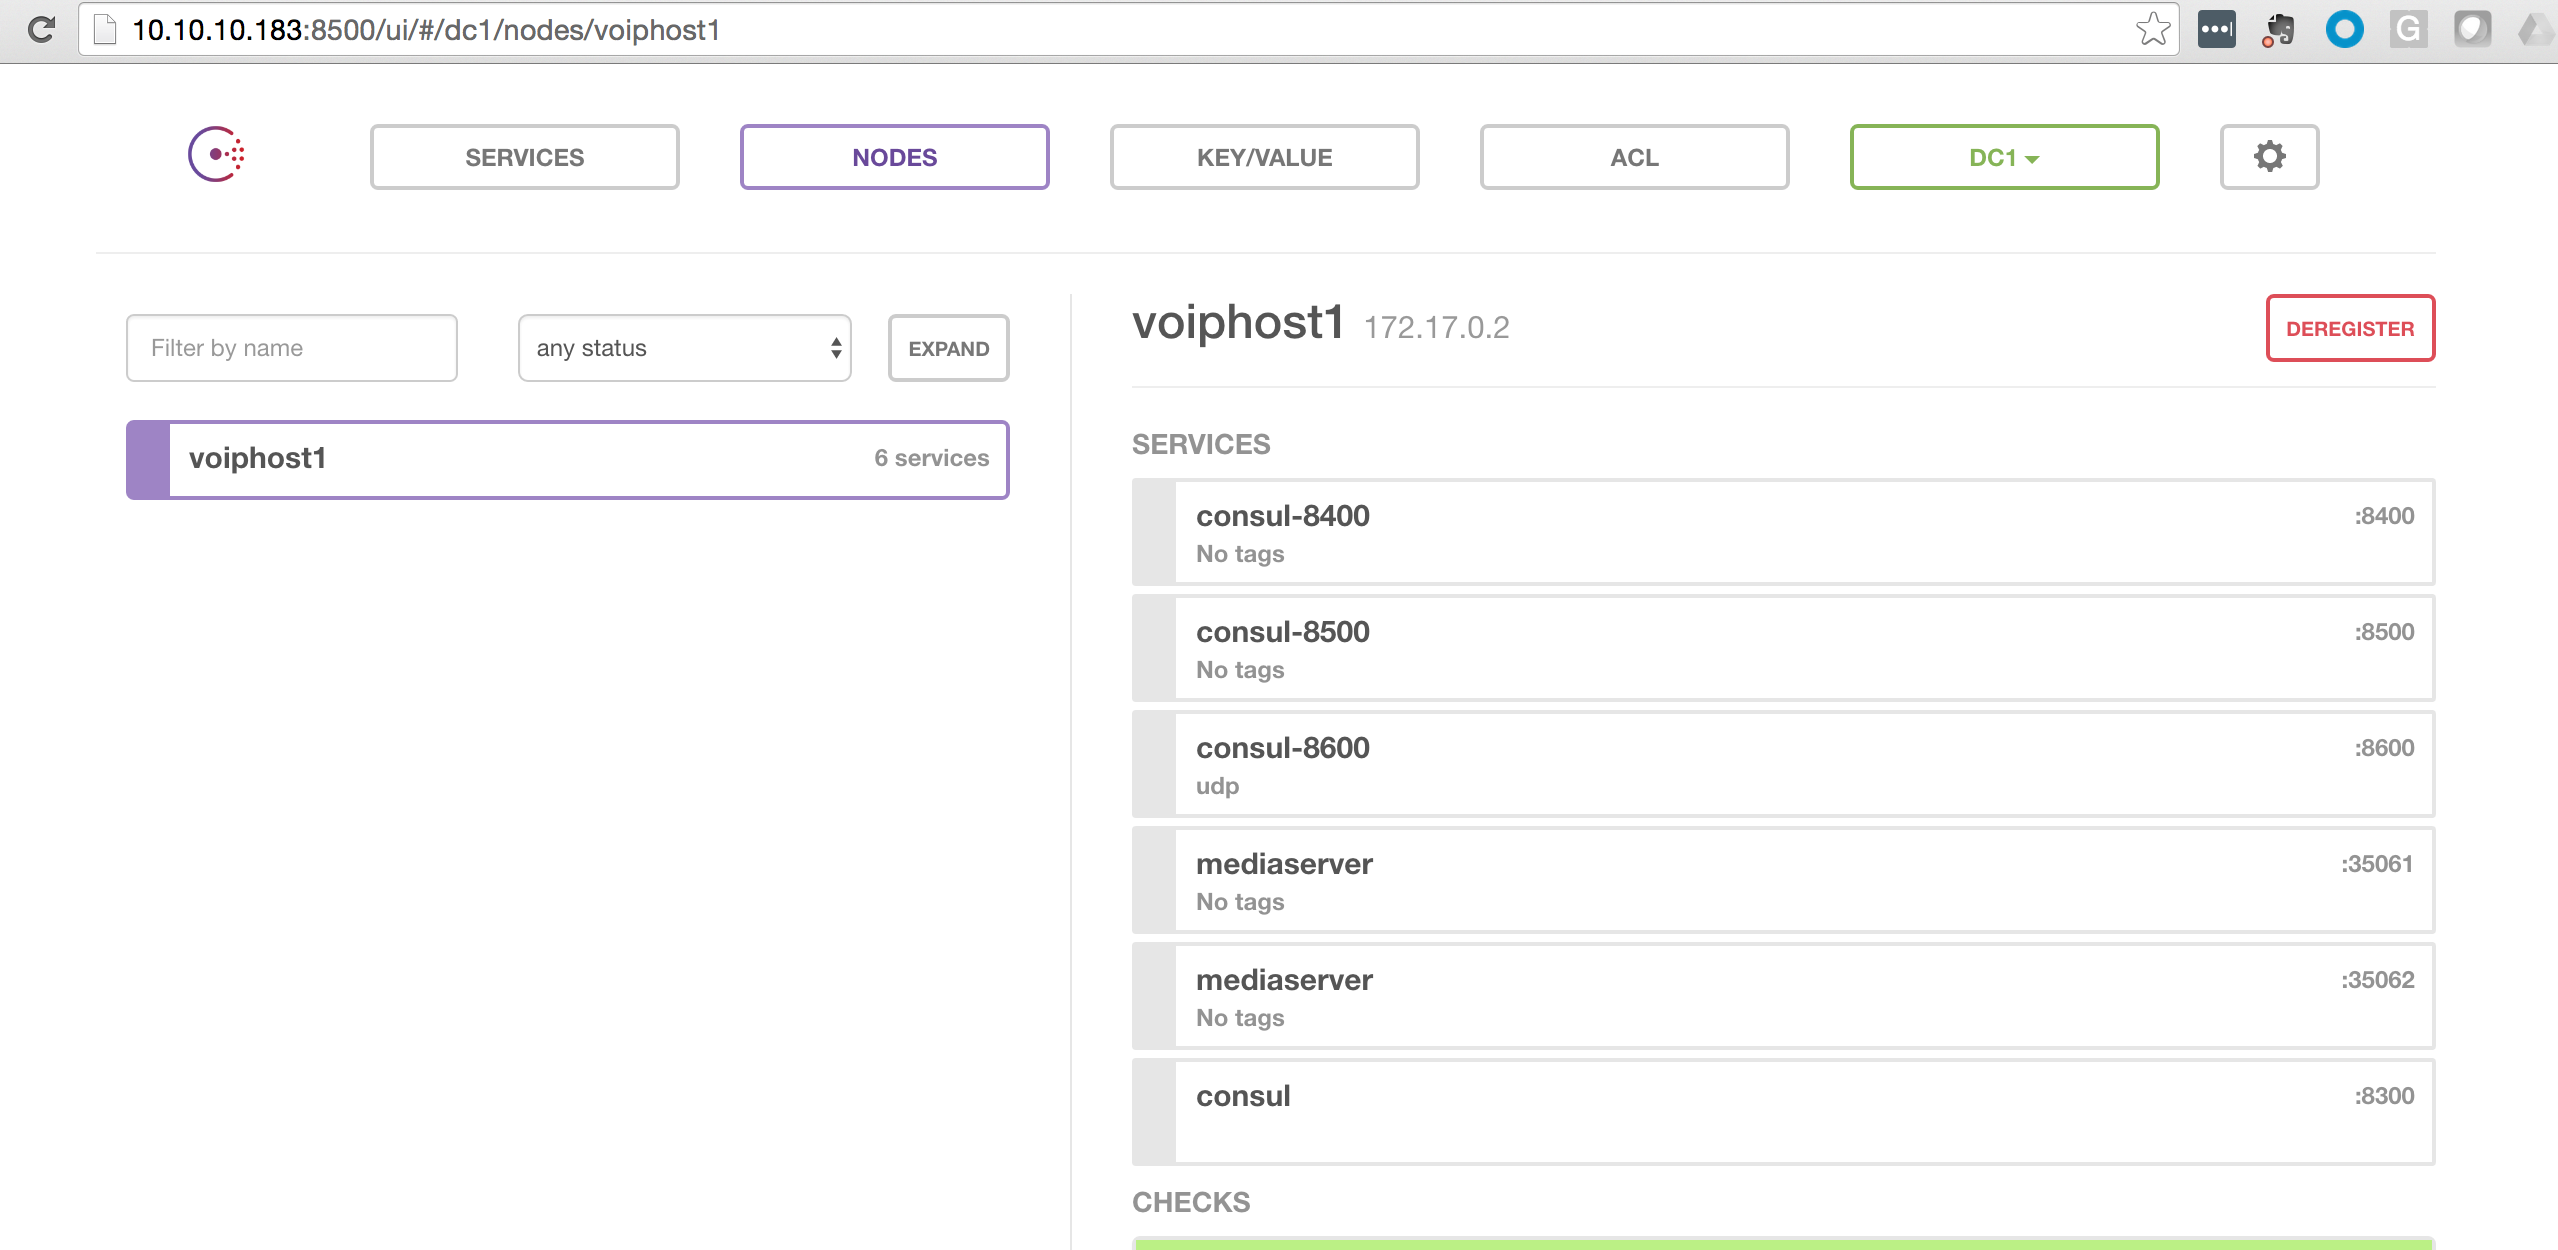
The above command will start the cluster and make the Consul web interface available on the host machine via port 8500 and make a DNS interface available to us on port 8600. Below is a screenshot of the Consul web interface after running the above command.

picture of the consul UI when it first starts

Now we need to have a mechanism to automatically register Asterisk servers with the cluster and specify the SIP ports that the server is listening on. For example, we might want to spin up 3 Asterisk servers to handle the load. We need to have a way to tell the cluster the IP address and the Asterisk SIP port number of these servers without having to manually configure the cluster. This is done using Registrator, which was developed by GliderLabs.

You can start Registrator by by running:

docker run -d -v /var/run/docker.sock:/tmp/docker.sock --privileged gliderlabs/registrator:latest consul://10.10.10.183:8500

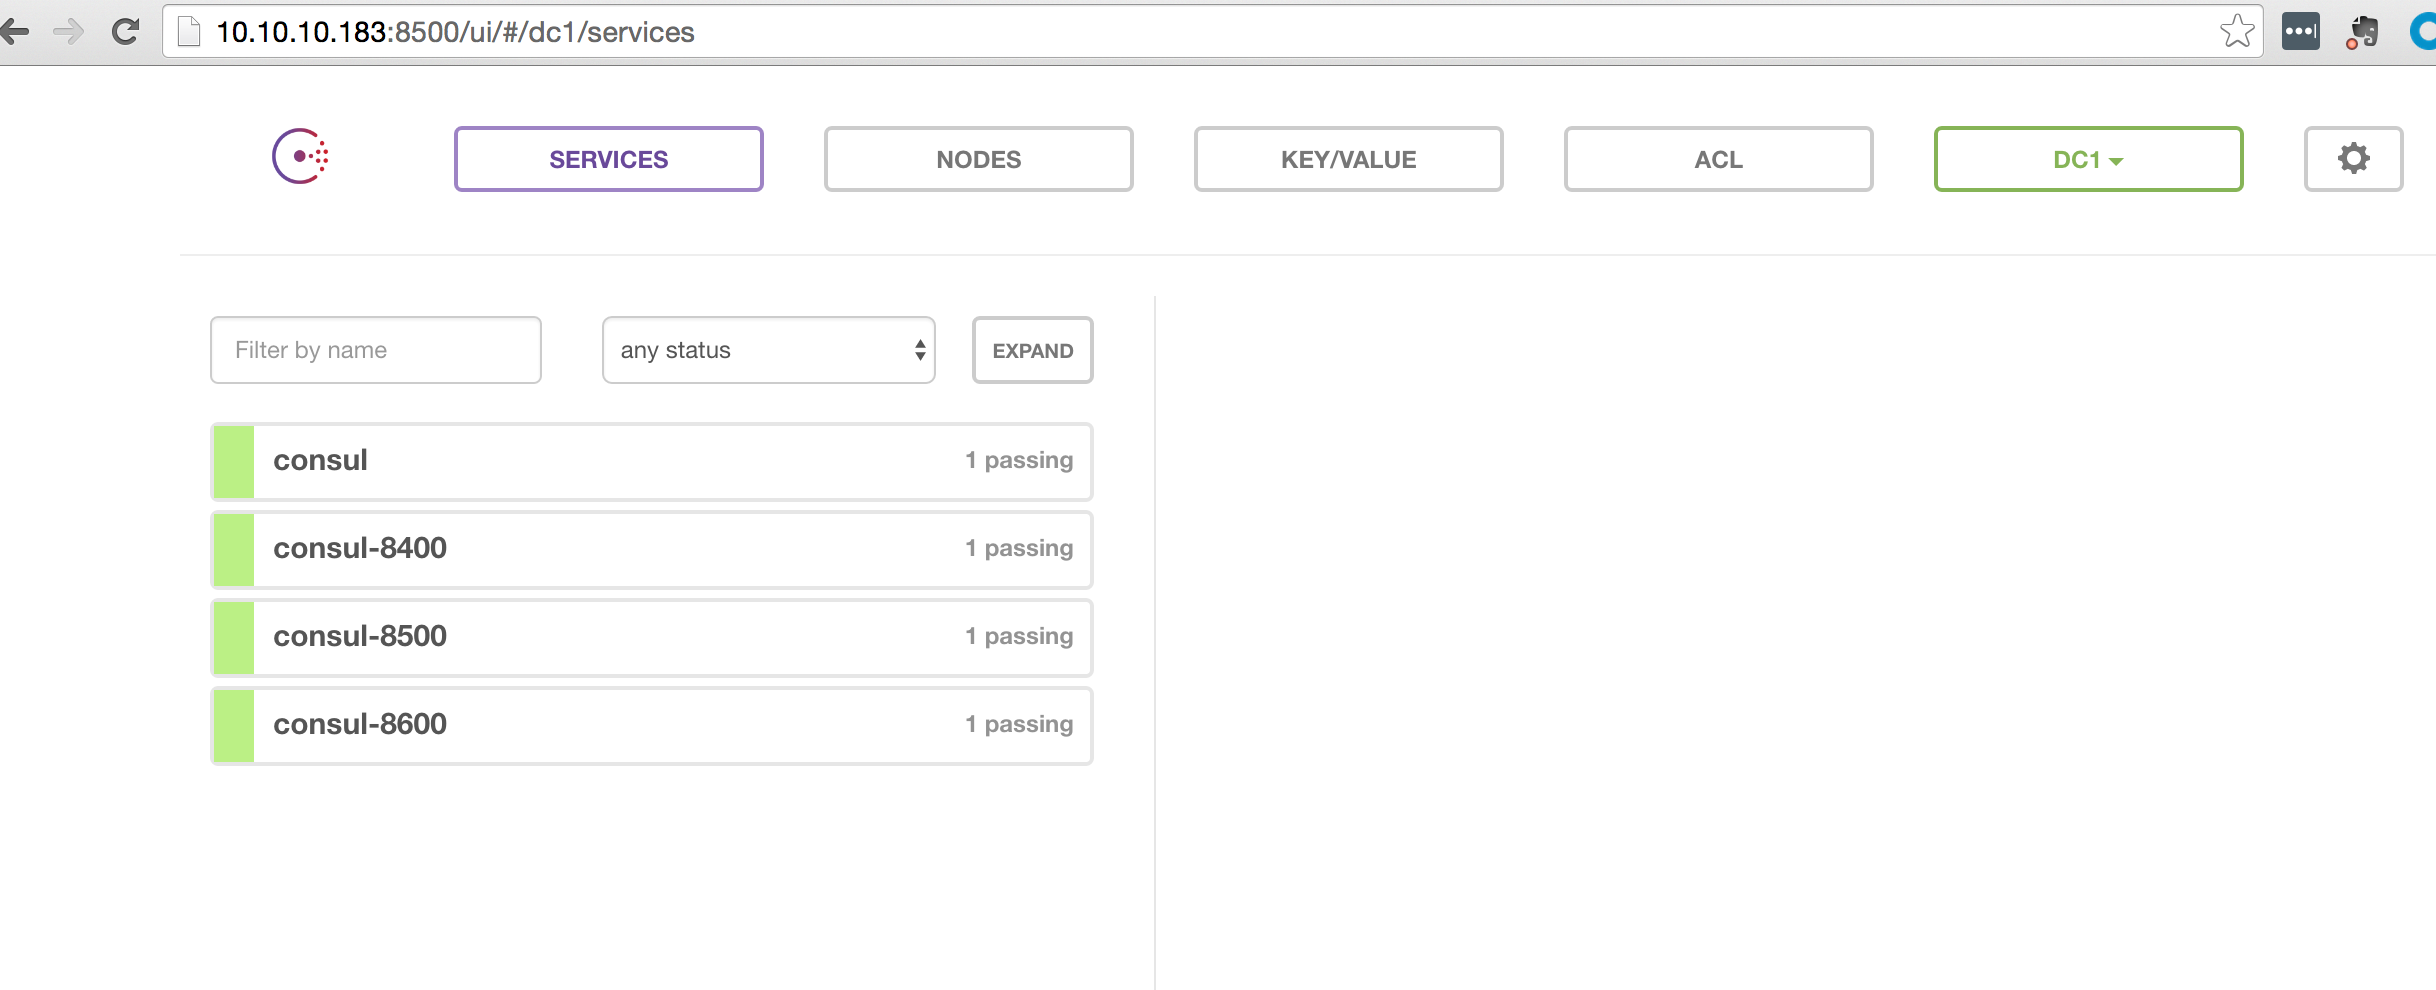
The above command will start the Registrator container and listen for Docker events using the Unix socket (/var/run/docker.sock). This port acts as a control port for Docker. We will dig deeper into this socket in upcoming articles. All we need to understand right now is that start/stop events is sent via this socket each time a Docker container is started or stopped. We use the volume option (-v) to make the socket available to the Registrator container on /tmp/docker.sock. The last parameter specifies the registry that events should be sent to. In our case, we are using consul as the registry, but Registrator is designed to use other registries. The ip of our registry is the exposed ip address of the Consul server that we started earlier in the article. Here a picture of what Consul looks like after starting the Registrator container

picture of the consul URI after starting the Registrator

Now we need to registrator a coupe of media server, which can be done using:

docker run -d -p 35061:5060 -e "SERVICE_NAME=mediaserver" docker.io/cleardevice/docker-cert-asterisk13-ubuntu

docker run -d -p 35062:5060 -e "SERVICE_NAME=mediaserver" docker.io/cleardevice/docker-cert-asterisk13-ubuntu

The above commands will start two (2) Asterisk servers with a service name of “mediaserver”. In this example we had to specify the exposed port numbers, but this will typically be done randomly and automatically so that we don’t have to keep track of which port numbers are already in use versus what’s available. We will release our own asterisk server containers for these articles that will handle this for us – we will update the article once that is complete.

Here’s a picture of what Consul looks like now:

picture of the consul after starting media server

In Part II we will discuss how to deploy a SIP Proxy service ran by Kamailio that will automatically know how to route SIP traffic to Asterisk containers that are available on the cluster.

Moving to Docker – Practicing What We Preach (Work in Progress)

We have made a decision to jump head first into containers with a focus on providing Enterprise Grade Docker and Kubernetes Support.  It’s only right to convert our infrastructure into containers.  We are going to start with our bread and butter, which is our phone system.  Being a support company with a strong focus on helping companies deploy VoIP means that this is huge risk for us – we have to get this right or we will literally lose money.  But, if you never jump you will not soar.  In other words, if we are going to provide support for Docker, Kubernetes and in general Microservices we need to go through the process ourselves so that we can help others navigate the waters.

Current Environment

We currently use the FreePBX distribution as our PBX and Flowroute as our carrier (we love Flowroute by  the way).  We only use an handful of the options in FreePBX.  To be precise, we use:

  • IVR
  • Extension Management
  • Voicemail
  • Follow-me
  • Queues
  • Ring Groups
  • Conferences

If you think about it…each one of these features could become a container, but does that really make sense….not really sure yet.

Project Goals

We have decided to break this project into phases and we will make each new phase better by incorporating what we learned from the previous phases.

Phase I – Create a conference container and have all conference traffic be routed to 1 or more containers that just handles conferencing.  There are times when we had multiple conferences happening all at the same time, which causes performance issues.  We want a solution that would realize that the existing conference server has too many requests and it automatically spins up another conference server and start routing requests to the newly created instance.

More phases to come…

Proposed Components

  • Kamailio – to provide load balancing and routing of calls to one or more Asterisk servers
  • Asterisk – Media server
  • Docker
  • Consul – Will keep track of all Asterisk servers that are up and available

We will also need a Web GUI for managing the conferences and the other features that we need.  FreePBX is not container aware, so we are toying with the idea of developing a simple Web GUI that knows how to deal with functionality being containerized.

Building a Kamailio Docker image

In this tutorial we will go over how to create a Dockerfile for Kamailio and build our own Kamailio image. If you want to learn more about Dockerfile’s you can read through our other post on creating a Dockerfile.

Setup Dockerfile

  1. First thing we need to do is create a new directory for our Dockerfile.
mkdir docker_kamailio
  1. We then need to make our Dockerfile.
touch docker_kamailio/Dockerfile
  1. Next, open up the Dockerfile with your favorite editor so we can start building.
vim docker_kamailio/Dockerfile

Installing Kamailio

  1. We will be installing Kamailio on a CentOS 6 container. First thing we need to do is specify what docker image we want to start with. Add the following to your Dockerfile.
FROM centos:6
  1. Next, we need to add the Kamailio 4.4 Open Build Service repository to our yum.repos.d list.
RUN yum -y install wget
RUN wget -O /etc/yum.repos.d/home:kamailio:v4.4.x-rpms.repo http://download.opensuse.org/repositories/home:/kamailio:/v4.4.x-rpms/CentOS_6/home:kamailio:v4.4.x-rpms.repo
RUN yum -y update
  1. Now that the Kamailio 4.4 repository is added to our system, it is time to install the kamailio packages. For simplicity of running the whole Kamailio stack on one container, we will be using SQLite as our back end database.
RUN yum install -y kamailio kamailio-debuginfo kamailio-utils gdb kamailio-sqlite

Setting up kamctlrc

We need to configure kamctlrc to use SQLite and to not prompt us during the database creation.

  1. Set the DBENGINE, DBHOST, and DB_PATH.
WORKDIR /etc/kamailio/

RUN echo "DBENGINE=SQLITE" >> kamctlrc
RUN echo "DBHOST=localhost" >> kamctlrc
RUN echo "DB_PATH="/usr/local/etc/kamailio/kamailio.sqlite"" >> kamctlrc
  1. Next, we ne need to specify the following options so that kamdbctl won’t prompt us during the database creation.
RUN echo "INSTALL_EXTRA_TABLES=no" >> kamctlrc
RUN echo "INSTALL_PRESENCE_TABLES=no" >> kamctlrc
RUN echo "INSTALL_DBUID_TABLES=no" >> kamctlrc

Creating Back End Database

  1. SQLite requires a file it can write the database to. We need to make a directory and file, which was already specified in the DB_PATH variable added to the kamctlrc file.
RUN mkdir /usr/local/etc/kamailio
RUN touch /usr/local/etc/kamailio/kamailio.sqlite
  1. If all the settings in kamctlrc are correct, and /usr/local/etc/kamailio/kamailio.sqlite exists, we should be able to create the Kamailio Database without any prompts interrupting our automated build.
RUN /usr/sbin/kamdbctl create

Running Kamailio

  1. Add the following kamctl command to create a user for testing.
RUN kamctl add 1000@dopensource.com opensourceisneat
  1. Next, we need to specify which ports to expose. Because Kamailio does not handle media, we only need to open up port 5060 for SIP.
EXPOSE 5060/udp
  1. Finally, we need to specify what command to run when the container is started up
CMD["/usr/sbin/kamailio", "-m 64", "-M 8", "-D"]

Finished Dockerfile

Now that we have a finished Dockerfile, you can exit out of your editor, saving any changes. The file should look something like this.

FROM centos:6

RUN yum -y install wget
RUN wget -O /etc/yum.repos.d/home:kamailio:v4.4.x-rpms.repo http://download.opensuse.org/repositories/home:/kamailio:/v4.4.x-rpms/CentOS_6/home:kamailio:v4.4.x-rpms.repo
RUN yum -y update
RUN yum install -y kamailio kamailio-debuginfo kamailio-utils gdb kamailio-sqlite

WORKDIR /etc/kamailio/

RUN echo "DBENGINE=SQLITE" >> kamctlrc
RUN echo "DBHOST=localhost" >> kamctlrc
RUN echo "DB_PATH="/usr/local/etc/kamailio/kamailio.sqlite"" >> kamctlrc
RUN echo "INSTALL_EXTRA_TABLES=no" >> kamctlrc
RUN echo "INSTALL_PRESENCE_TABLES=no" >> kamctlrc
RUN echo "INSTALL_DBUID_TABLES=no" >> kamctlrc

RUN mkdir /usr/local/etc/kamailio
RUN touch /usr/local/etc/kamailio/kamailio.sqlite

RUN /usr/sbin/kamdbctl create

RUN kamctl add 1000@dopensource.com opensourceisneat

EXPOSE 5060/udp

CMD ["/usr/sbin/kamailio", "-m 64", "-M 8", "-D"]

Building and running the new image

  1. Build the image using the docker build command. This will build an image called dopensource/kamailio4.4.
cd docker_kamailio
docker build -t dopensource/kamailio4.4 .
  1. Run a Kamailio container to test out our new image. Remember to map the SIP port to your docker host.
docker run -dit -p 5060:5060/udp dopensource/kamailio4.4
  1. You should now be able to register a softphone to your new Kamailio instance. Because we mapped 5060 to 5060 on the Docker host, you will be using your Docker host’s ip address for registration.
User ID: 1000
Domain:
Password: opensourceisneat

Kamailio Quick Install Guide for v4.4

Kamailio 4.4 on CentOS 6.

Are you looking for the CentOS 7.x version?  It can be found here

Setup YUM Repository

  1. Install wget so we can pull down the rpm.
yum install wget
  1. Let’s download the yum repo file for our Cent OS version.
cd /etc/yum.repos.d/
wget http://download.opensuse.org/repositories/home:/kamailio:/v4.4.x-rpms/CentOS_6/home:kamailio:v4.4.x-rpms.repo
  1. Update system so yum is aware of the new repository.
yum update
  1. You can look at the kamailio packages in the YUM repository by typing:
yum search kam

Install Kamailio and Required Database Modules

  1. Install the following packages from the new repo.
yum install -y kamailio kamailio-mysql kamailio-debuginfo kamailio-unixodbc kamailio-utils gdb
  1. Set kamailio to start at boot.
chkconfig kamailio on
  1. The Kamailio configuration files will be owned by the root user, rather than the kamailio user created by the Kamailio package. We will need to change the ownership of these files.
chown kamailio:kamailio /etc/default/kamailio
chown -R kamailio:kamailio /etc/kamailio/
chown -R kamailio:kamailio /var/run/kamailio

Install MySQL

  1. Since we plan on using MySQL, we will need to instal the MySQL server as well as the client.
yum install -y mysql-server mysql
  1. Next we need to start up MySQL:
service mysqld start
  1. And enable mysqld at boot.
chkconfig mysqld on
  1. Now we can set a root password for mysql:

You can hit yes to all the options. There is no root password as of yet, so the first question will be blank. Be sure to use a secure unique password for your root user.

[root@localhost yum.repos.d]# sudo /usr/bin/mysql_secure_installation

NOTE: RUNNING ALL PARTS OF THIS SCRIPT IS RECOMMENDED FOR ALL MySQL
SERVERS IN PRODUCTION USE! PLEASE READ EACH STEP CAREFULLY!

In order to log into MySQL to secure it, we'll need the current
password for the root user. If you've just installed MySQL, and
you haven't set the root password yet, the password will be blank,
so you should just press enter here.

Enter current password for root (enter for none):
OK, successfully used password, moving on...

Setting the root password ensures that nobody can log into the MySQL
root user without the proper authorisation.

Set root password? [Y/n]
New password:
Re-enter new password:
Password updated successfully!
Reloading privilege tables..
... Success!

By default, a MySQL installation has an anonymous user, allowing anyone
to log into MySQL without having to have a user account created for
them. This is intended only for testing, and to make the installation
go a bit smoother. You should remove them before moving into a
production environment.

Remove anonymous users? [Y/n]
... Success!

Normally, root should only be allowed to connect from 'localhost'. This
ensures that someone cannot guess at the root password from the network.

Disallow root login remotely? [Y/n]
... Success!

By default, MySQL comes with a database named 'test' that anyone can
access. This is also intended only for testing, and should be removed
before moving into a production environment.

Remove test database and access to it? [Y/n]
- Dropping test database...
... Success!
- Removing privileges on test database...
... Success!

Reloading the privilege tables will ensure that all changes made so far
will take effect immediately.

Reload privilege tables now? [Y/n]
... Success!

Cleaning up...

All done! If you've completed all of the above steps, your MySQL
installation should now be secure.

Thanks for using MySQL!

Configure Kamailio to use MySQL

  • By default, Kamailio does not use MySQL. To change this we need to edit one of Kamailio’s configuration files.
vi /etc/kamailio/kamctlrc
  1. Uncomment the DBENGINE parameter by removing the pound symbol and make sure the value equals MYSQL. The parameter should look like this afterwards:
DBENGINE=MYSQL
  1. To have the kamdbctl command create the mysql database with the correct permissions, we will want to set the databaseusers and passwords in kamctlrc
## database read/write user
DBRWUSER="kamailio"

## password for database read/write user
DBRWPW="kamailiorw"

## database read only user
DBROUSER="kamailioro"

## password for database read only user
DBROPW="kamailioro"

Create the Kamailio Database Schema

  • The Command will create all the users and tables needed by Kamailio. You will be prompted to put in the MySQL root password that you created in the Install MySQL section of this document. You will be asked if you want to install different tables – just say “yes” to all the questions.
/usr/sbin/kamdbctl create
  • Below are all the prompts you will be presented:
MySQL password for root: ''
Install presence related tables? (y/n):
Install tables for imc cpl siptrace domainpolicy carrierroute userblacklist htable purple uac pipelimit mtree sca mohqueue rtpproxy?
(y/n):
Install tables for uid_auth_db uid_avp_db uid_domain uid_gflags uid_uri_db? (y/n):
  • The following MySQL users and passwords are created (please change these in a production environment).

  • kamailio – (With default password ‘kamailiorw’) – user which has full access rights to ‘kamailio’ database.

  • kamailioro – (with default password ‘kamailioro’) – user which has read-only access rights to ‘kamailio’ database.

Enable the mysql and auth modules.

Add the following to the beginning of the kamailio.cfg after #!KAMAILIO

#!define WITH_MYSQL
#!define WITH_AUTH

Update the DBURL line to match the username and password you set in kamctlrc before running kamdbctl

#!define DBURL "mysql://kamailio:kamailioro@localhost/kamailio"

Start the Kamailio Server

service kamailio start

We also need to edit /etc/default/kamailio to notify Kamailio that is is configured and ready to go.

Uncomment the following:

RUN_KAMAILIO=yes

Test Kamailio

  • In order to test that Kamailio is working correctly, I’m going to create a SIP user account and register that account using a softphone such as X-Lite, Linphone, or Zoiper.

Create SIP User Accounts

  • The following command will create a new SIP User. Note, that hte domain portion has to be specified unltess you export hte SIP_DOMAIN environment variable.
kamctl add <extension@domain>
  • Here is what I created
kamctl add 1001@dopensource.com opensourceisneat

Registering a SIP Softphone

  • configure whichever softphone you choose with the following options:
User ID: 1001
Domain:
Password: opensourceisneat
  • Once you are registered, you can view all the registered extensions in kamailio with the following command.
kamctl ul show

Make a Test Call

  • You can call yourself by entering 1001 into your softphone. If it rings then you have a basic Kamailio server installed and ready to be configured to provide load balancing, failover, accounting, etc. As an exercise, you should create another SIP user account and register that user using another softphone and try calling between the two SIP users.

References

  • Install And Maintain Kamailio v4.1.x From GIT – http://www.kamailio.org/wiki/install/4.1.x/git